I was just so tired of having only low intensity headlamps available to me, and as a student, the price of 140USD was just unbearable for a 800 lumen headlamp. And ofcourse, it is much more fun to make your own! It was intended to use it as a bike-light for afternoons in the forests with my mountainbike, but because of parts delay it wasnt finished before the snow claimed the forest trails.
Parts
All prices are in NOK
- 50W COB LED (37,-)
- Reflector + collimator lens kit for the COB LED (24,-)
- 5m 18AWG flexible silicone wire (46,-)
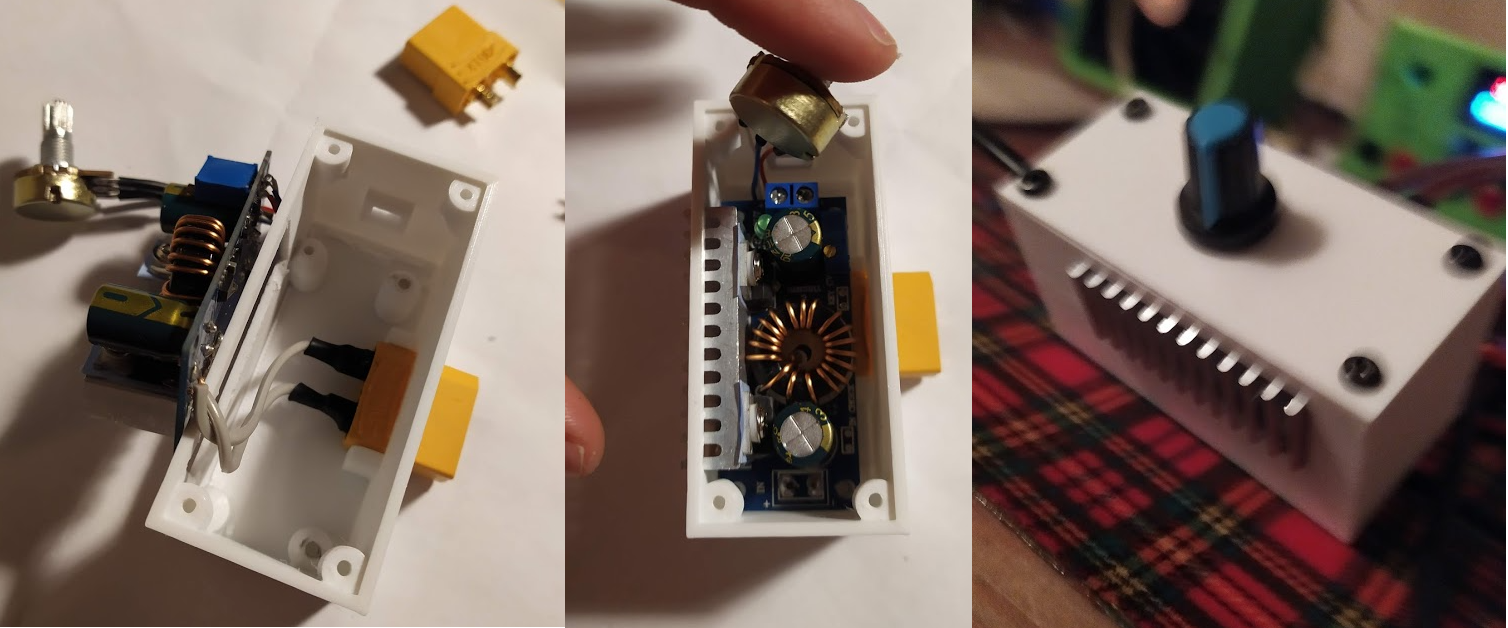
- DC-DC Boost converter up to 32V, 50W (35,-)
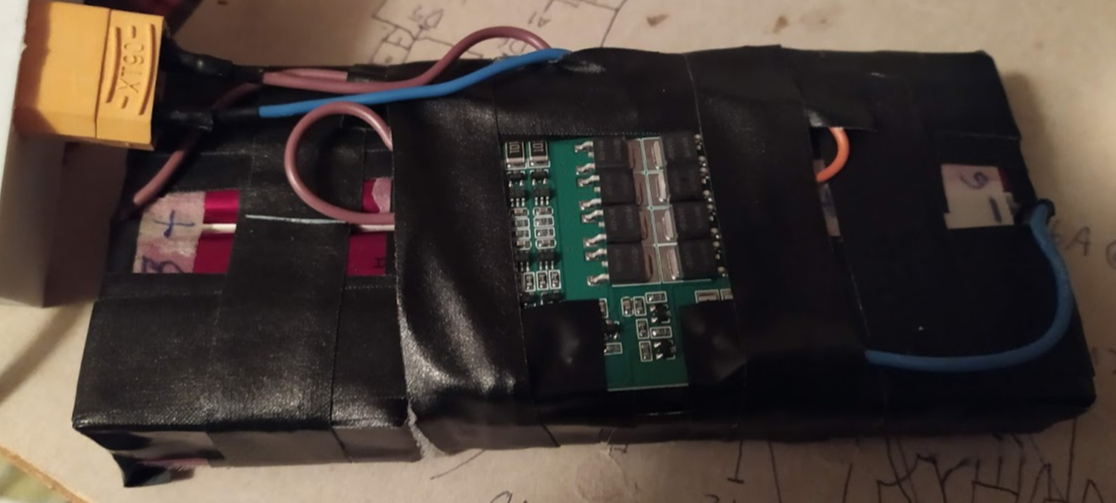
- 3S 12V 25A Li-ion BMS (20,-)
- Potentiometer 16k
- Batteries, the amount must fit your BMS. I had old laptop batteries laying around.
- Some 3D printing filament and access to a 3D printer (I spent around 45,- on the entire filament.)
- Heatsink which fits the COB-led. I had one laying around from an old computer.
- Wire; I used old lamp wire.
- Heat conducting paste.
- Solder and heatshrink
Total price: 167,- NOK (20USD)
Design
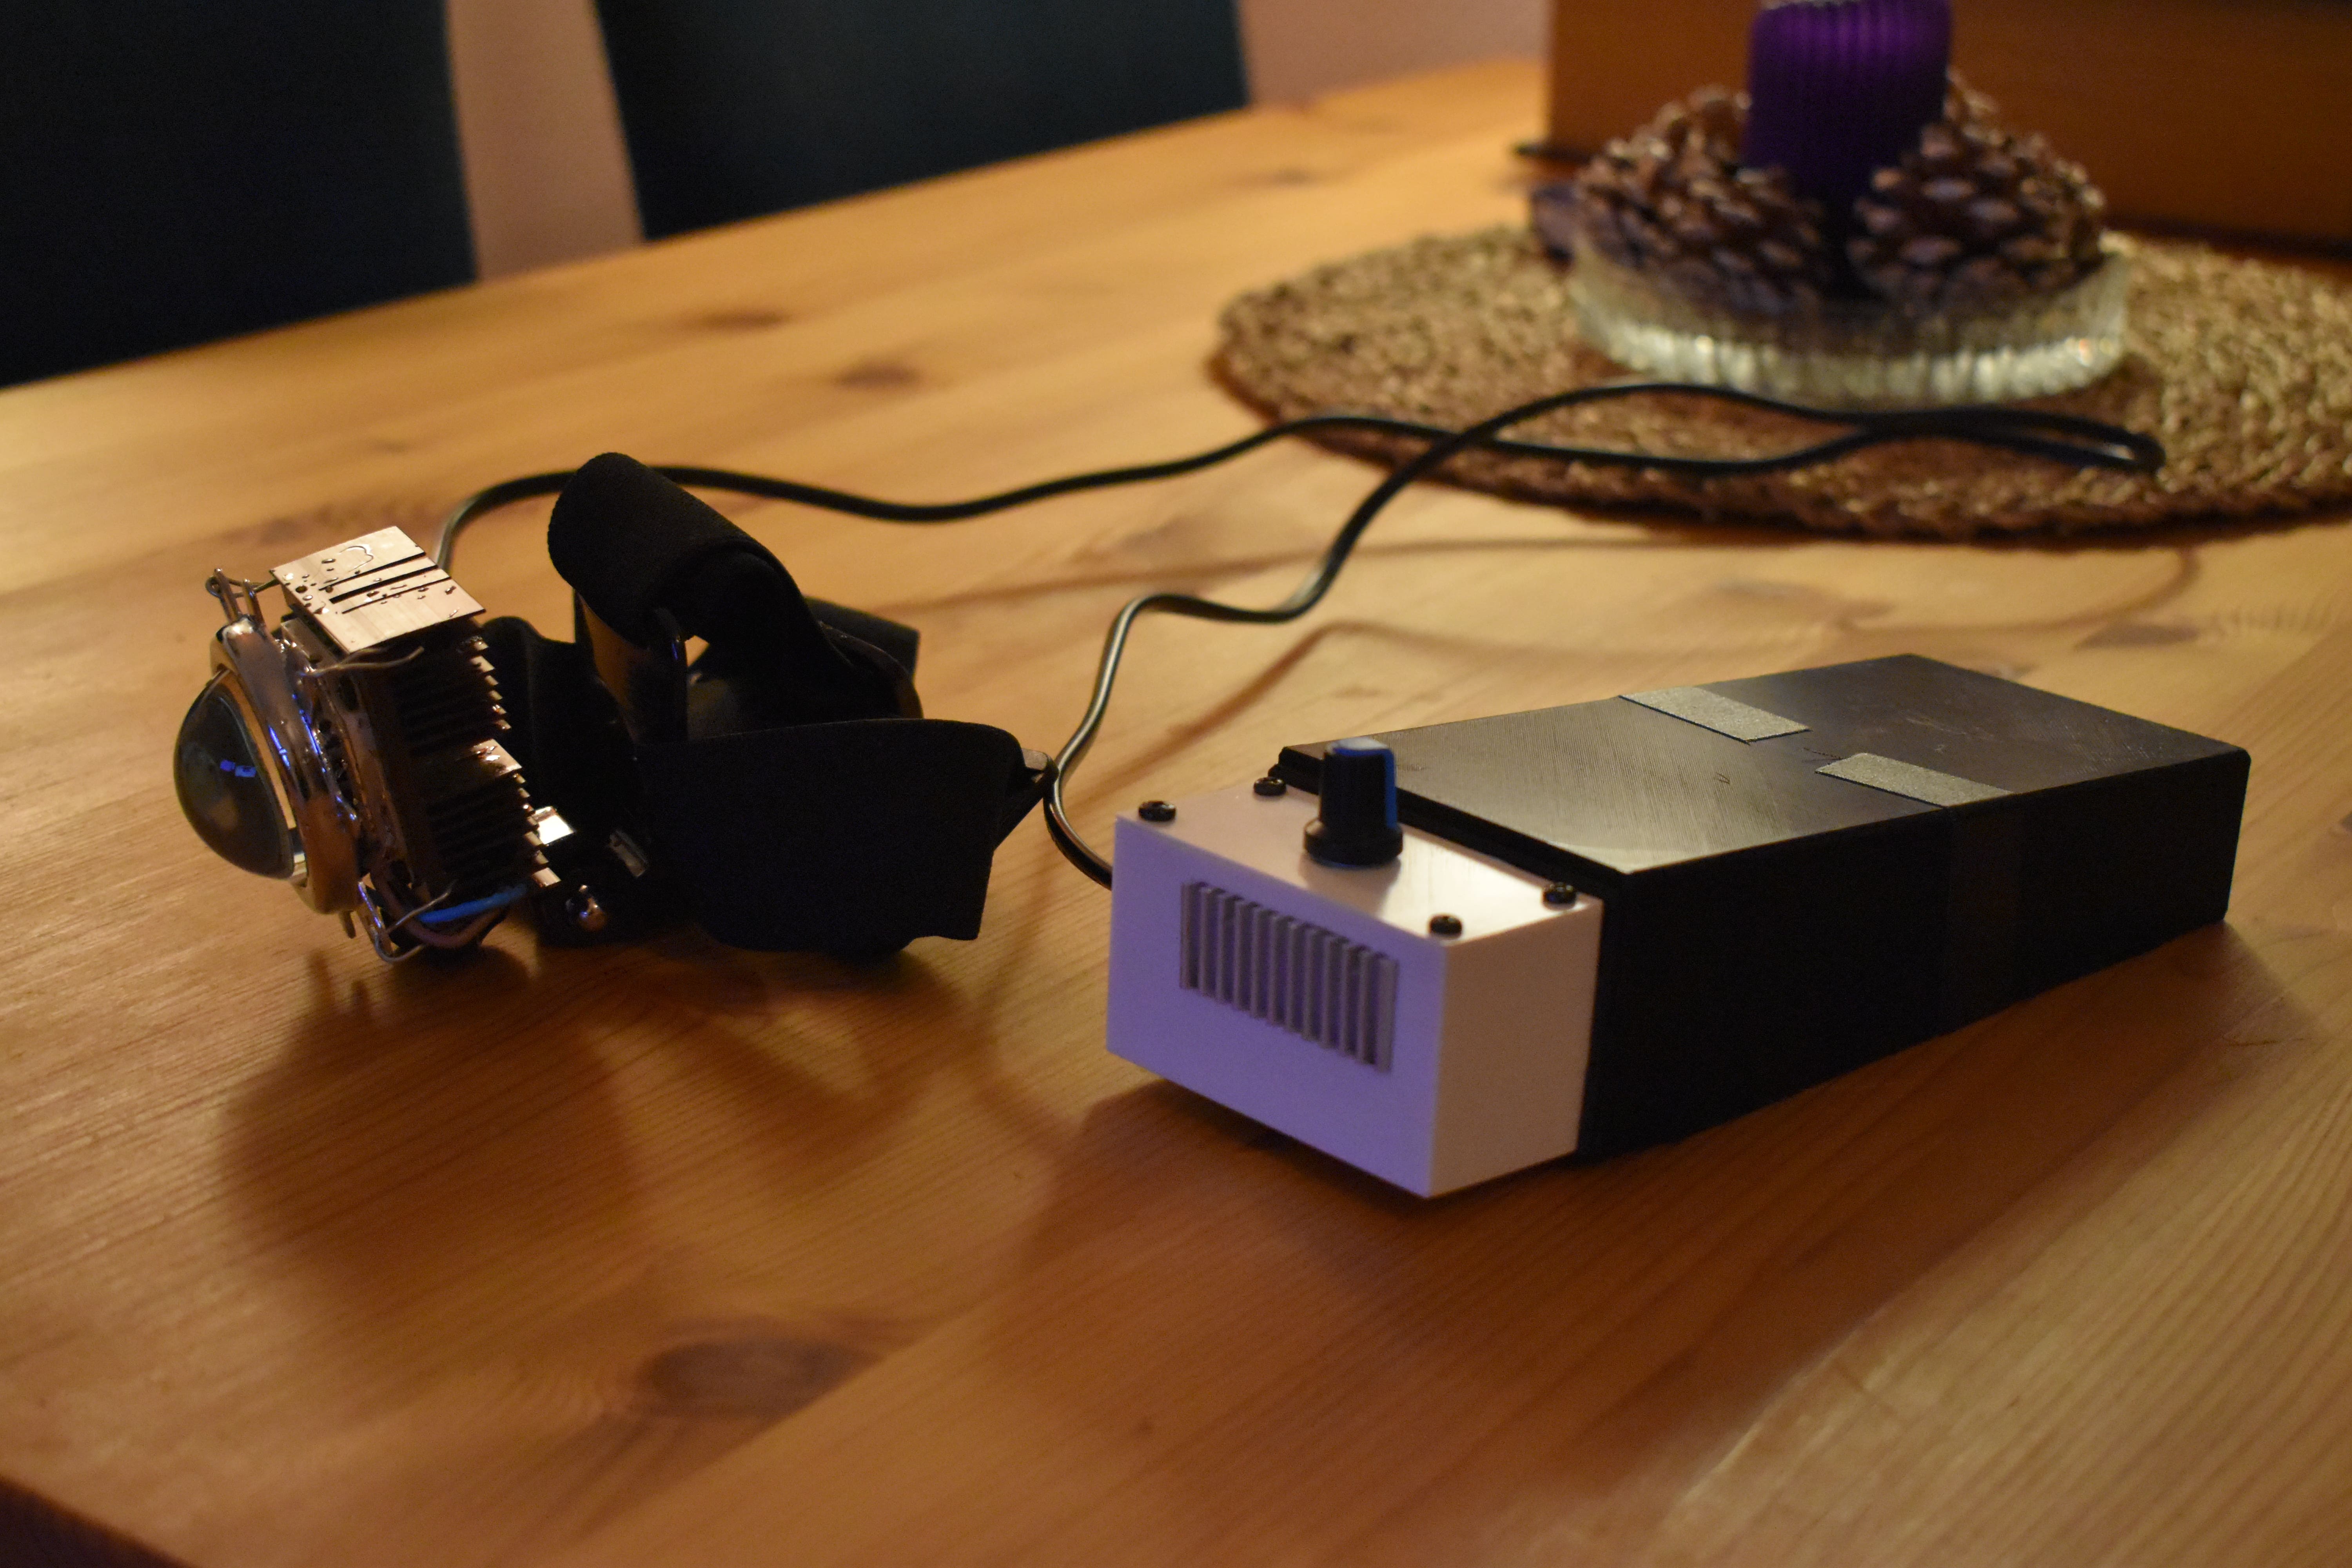
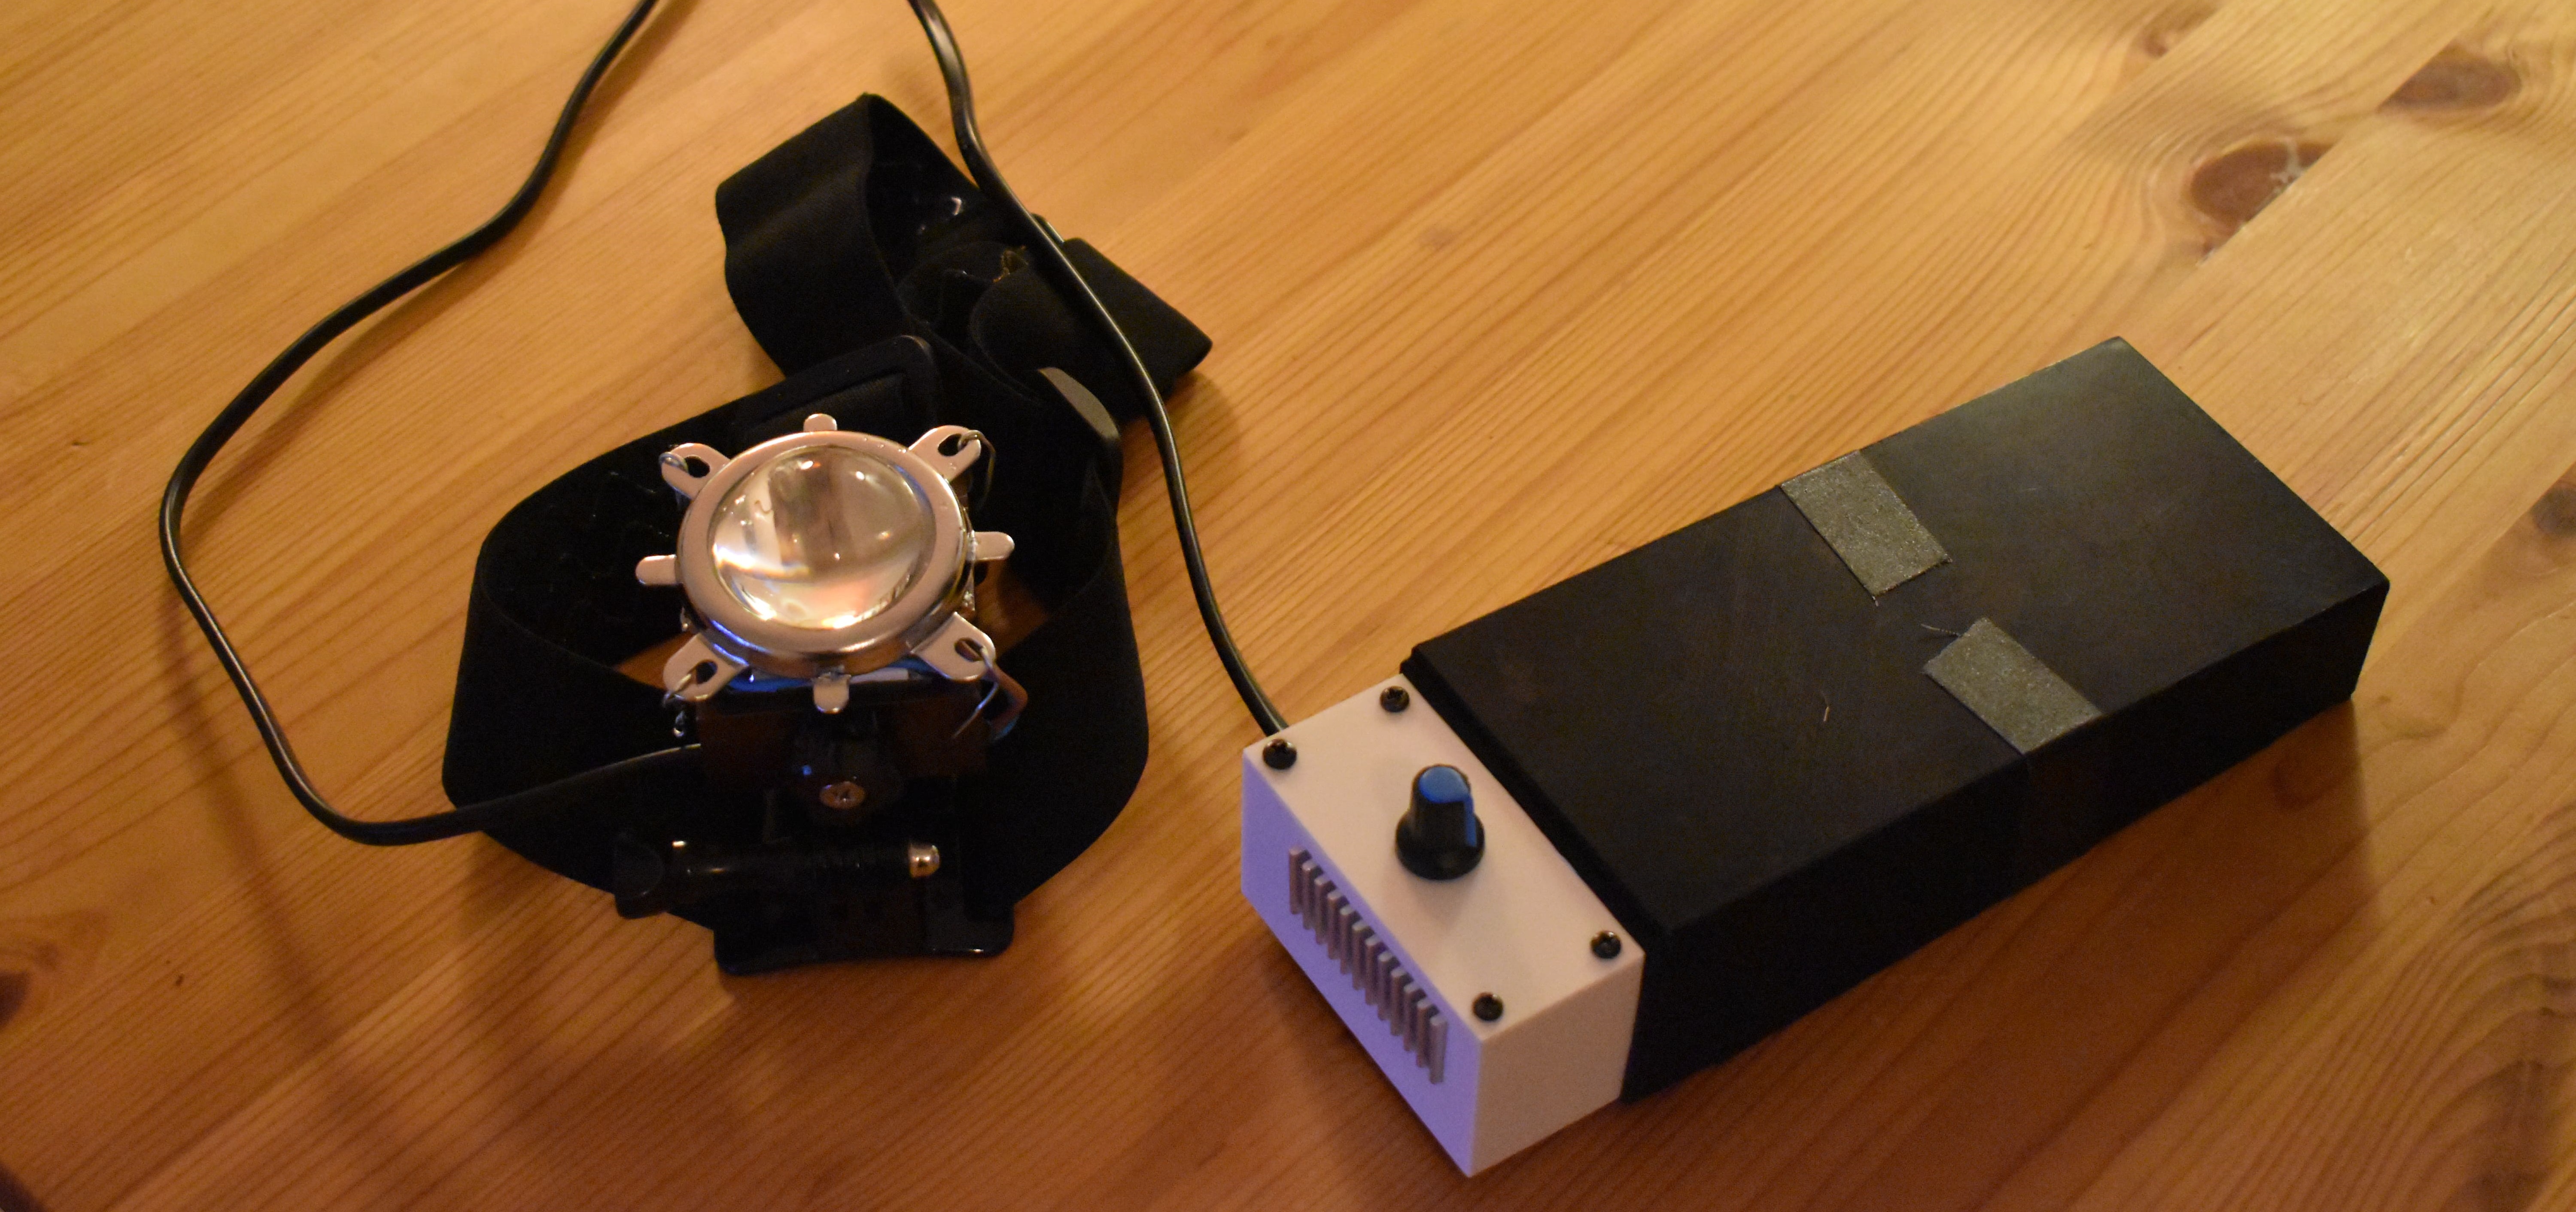
When working with what was at hand, and wanting to do this quick, I matched my parts selection to fit whatever I already had. It consists of one 12V battery, designed to be used for other purposes as well. This is then directly plugged in to the boost converter, which has the dimming potentiometer. From here, a wire pair runs up to the headlamp, where the LED is sandwiched between the heatsink and the collimator lens.
Battery
Since I had old laptop batteries, I found that for a 50W LED, and some loss in the boost converter, I needed at least 100Wh in the battery pack to last two hours. Thus, It could not be mounted on my head and had to be remote, either in a pocket or in a backpack. The cells I had was rated at 7Wh each, but is probably more like 5Wh. This meant that I needed 20 cells to reach 100Wh!
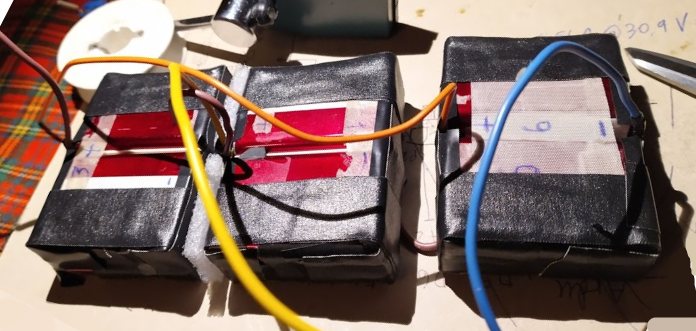
This was very much, and I didn’t have enough cells for this. What I did was to put four cells in series, and three of these ones in paralell(3S4P).
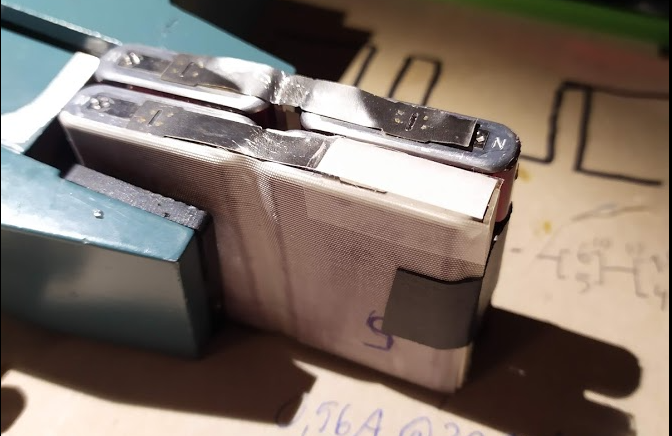 This meant a potential of 12V, and a much needed high current from the 4P, as old laptop batteries probably have a very low C-rate limit. This added up to only 12 cells and 60Wh, which is enough for one hour on full power. This is acceptable since the headlamp is way too bright at full power, and will probably be used the most on 10% during climbs, and 60% during decents. The full 100% power is mostly used for scouting, very open areas or signaling.
The cell testing was done on a IMAX B6 eBay clone. The test was beeing fully charged, then discharged, and charged again. The cells were put in paralell groups so the capacities would match between the paralell groups.
Lastly, the BMS was soldered in, together with a XT90 connector. This can in retrospect just have been directly soldered to the boost converter, since I haven’t found other uses for the battery pack just yet.
Boost converter/LED controller
The LED controller is simply just a boost converter, with a maximum intensity capped by the on-board potentiometer. Further tuning of the light brightness is done by another potentiometer wired in series to this one. This can then tune the output voltage of the controller from 0V to 32V, which is max operating voltage.
Head unit
For the head unit, I simply drilled four holes in the heatsink, then added a dab of heatpaste, and screwed the LED COB on. Then, I soldered the LED to the wires, and ran them through the heatsink for support, and glued them so they would sit. Then the collimator lens was added and is per now just attached by some metal wire (which is surprisingly stable and strong). I also screwed a camera-to-gopro mount in to the heatsink which allows it to be mounted to a GoPro headband. Very convenient!
(Learning) Outcome
What I learned from this project was that easy projects can be fun too! In addition, cheap lenses and multi-source lighting is really hard to create pretty light from. The lightbeam is okay but it has a lot of chromatic abberation, and you can even see intensity changes from the individual LEDS in the LED matrix.
Also, I figured that if you want a small, portable package, considerable thought and care would be a necessity to get the heat dissipation, and battery pack powerful enough.
It has been in use on many skiing trips already, and it has been very nice to finally see far in the forests!