This project started in the winter of 2017/2018, and I can safley say it has taken way too much time. In this Article I will walk you trough how I made it, and I will try to be structured so you can read individual sections by themselves. This electric mountainboard was made on an extreme budget, see parts list for price estimates.
Before we start we will need some parts, so go ahead and aquire the following:
Part list:
- 3d-printer(was free at my university)
- Used mountainboard MBS atom(35USD @Local private dude)
- ESC: FVT 120A Dual 6-12S (80USD @alibaba)
- Motors: 2xKeda 6364 2kW, 190Kv (2x50=100USD @HobbyKing)
- 10x Old laptop batteries(6x18650 per battery, for 10s6p config) (free, asked random IT firms)
- BMS (10USD @ eBay)
- Controller: Mini form (15USD @ eBay)
- 1 meter M8 threaded rod with nuts (20USD @Local hardware store)
- Threadlock (10USD @Local hardware store)
- 2x 47tooth gears (15USD @eBay)
- 2x 11tooth gears (6USD @eBay)
- 2x chains (10USD @ eBay)
- 5 sets XT90-connectors (6USD @eBay)
- 10 sets 5.5mm bullet connectors (5USD @eBay)
- 1 meter 12AWG silicon wire (5USD @eBay)
- Solder + flux (10USD @Local hardware store)
- 3mm flat unisolated ribbon-metal with soldercoat (6USD @Amazon)
- 18650 Battery brackets (5USD @eBay)
- Power analyzer, Wattmeter (10USD @ Amazon)
- 6 pcs Bolts with nuts, 1/4-20 by 1/2″ long bolts (rouded head with hex-key) UNC standard size nuts (5 USD @ eBay)
Total cost: 353$
Please note I also bought a couple of extras to this board:
- Balance charger, iMAX B6 (20USD @ eBay)
- Battery-chargning module, BST900 (20USD @ eBay)
So with everything, it cost me 383USD, which can be rounded up to 400USD for a little margin.
So, you will need access to a 3D-printer, and this can be extra cost for you if you need to pay for filament. Also, if you are not as lucky as me, to find a cheap MTB for sale locally, this might also be very expensive. Hot tip: The motorcontroller are only sold two at the time from the official seller, so either you buy two, and sell one (like i did) or you are lucky and find someone who sells one. The rest is pretty easy to get hold of, unless you dont have a source for batteries.
The Making!
Battery
Motor-mounts
Drivetrain
Motorcontroller
Battery
The battery was a pain in the start. Everyone seasoned in the 18650 scene(18650 is a li-ion battery cell type) knows that you should always spot weld the cells together to avoid heating up the battery too much. Heating a battery cell might damage it. However, I had no spot welder, and I couldn’t afford one either. If you have a spot welder, please go search the internet for how to make battery packs with it.
In this project I will make a 10S battery. That means 10 cells in series, for a total of 37V nominal. From the amount of laptop batteries I gathered, I was able to make a 6P pack. 6 in paralell is not nearly enough to deliver the current we need, at least not from laptop cells. But when budget is tight, corners has to be cut! This of course damages the batteries over time, and shorten their lifespan. How it affects performance, is also obviousley negative.
This tutorial will not be good enough for you to follow alone. I STRONGLY advise you to watch this entire series of how to build one, before building your own.
Click here for the video series.
Step 1:
Open the batterypacks from the laptops!
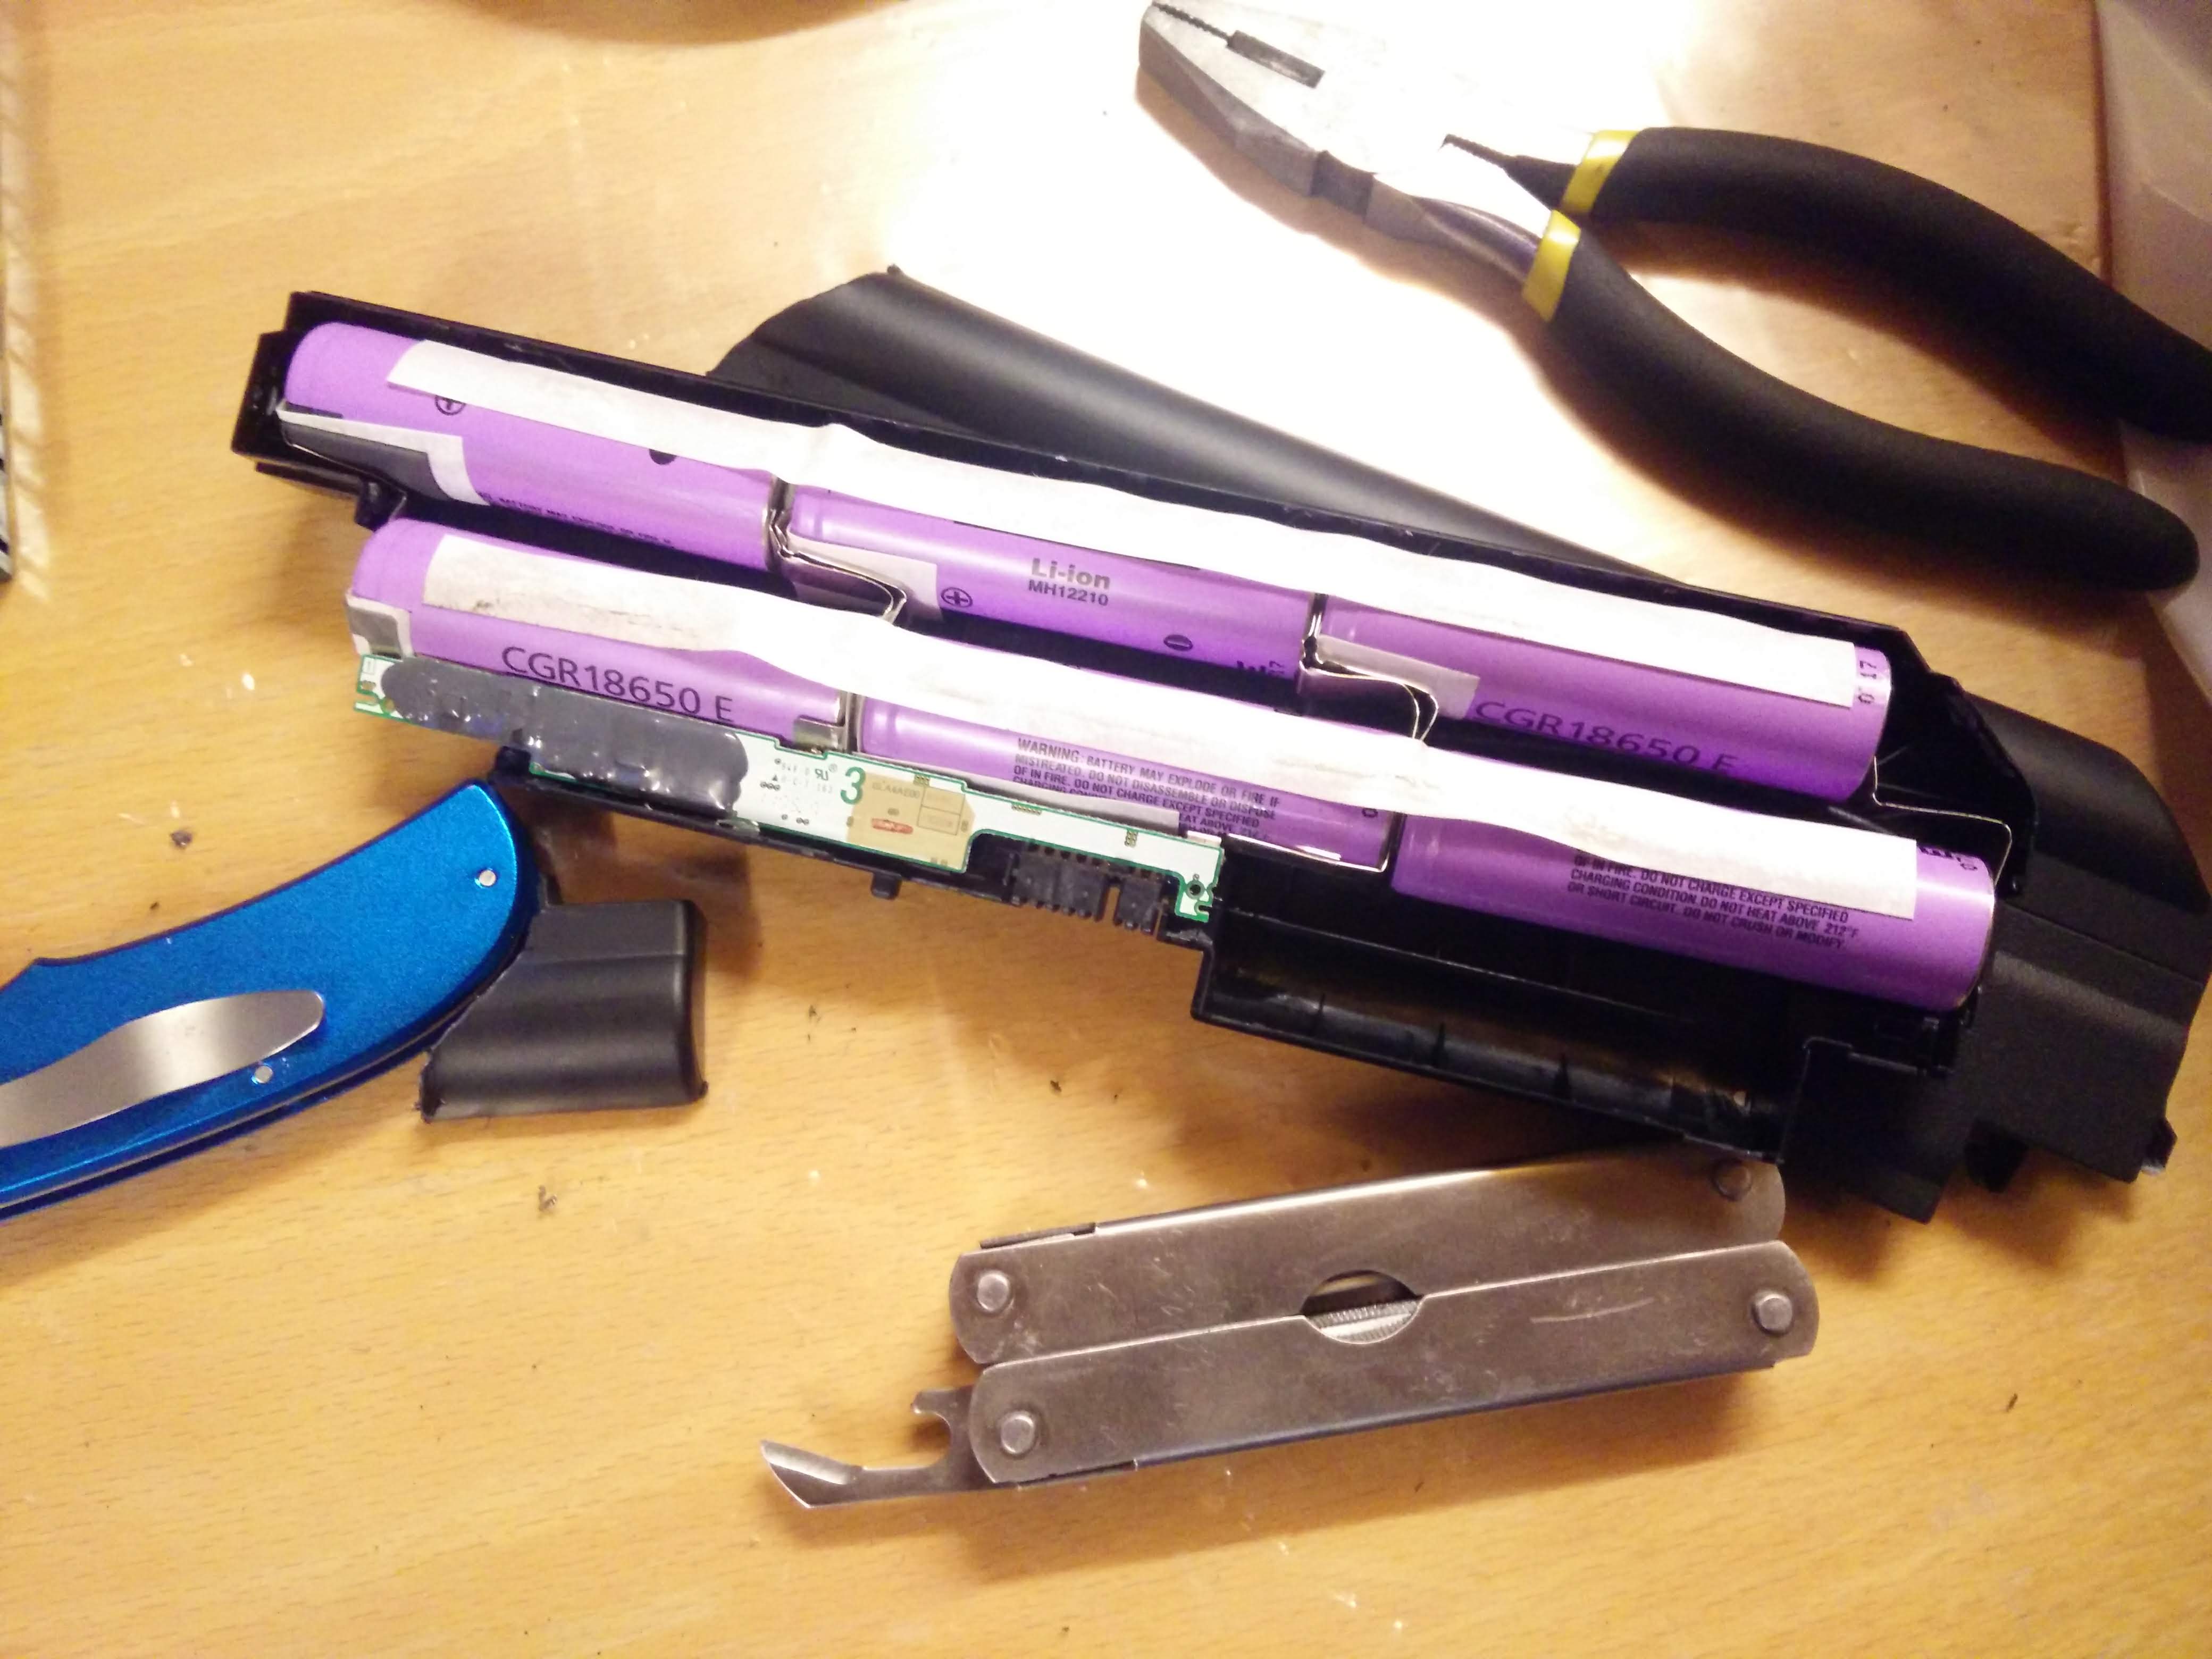
This is what one of the latop-batteries look like half opened. How to get them open, you will have to figure out for each individual battery design, but a hot tip, is to start at the seams.
Step 2:
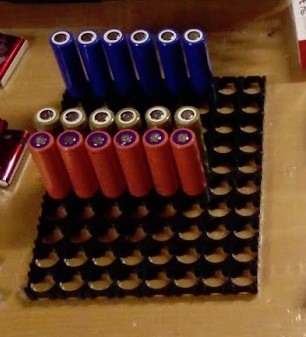
After the batteries are opened, and each cell individualized, you can start to test them. How to do this, you should google. I soldered them together, put them on the charger, and if anyone got “hot” during the charge, they were bad. Not the best technique, but I had limited time.
Step 3:
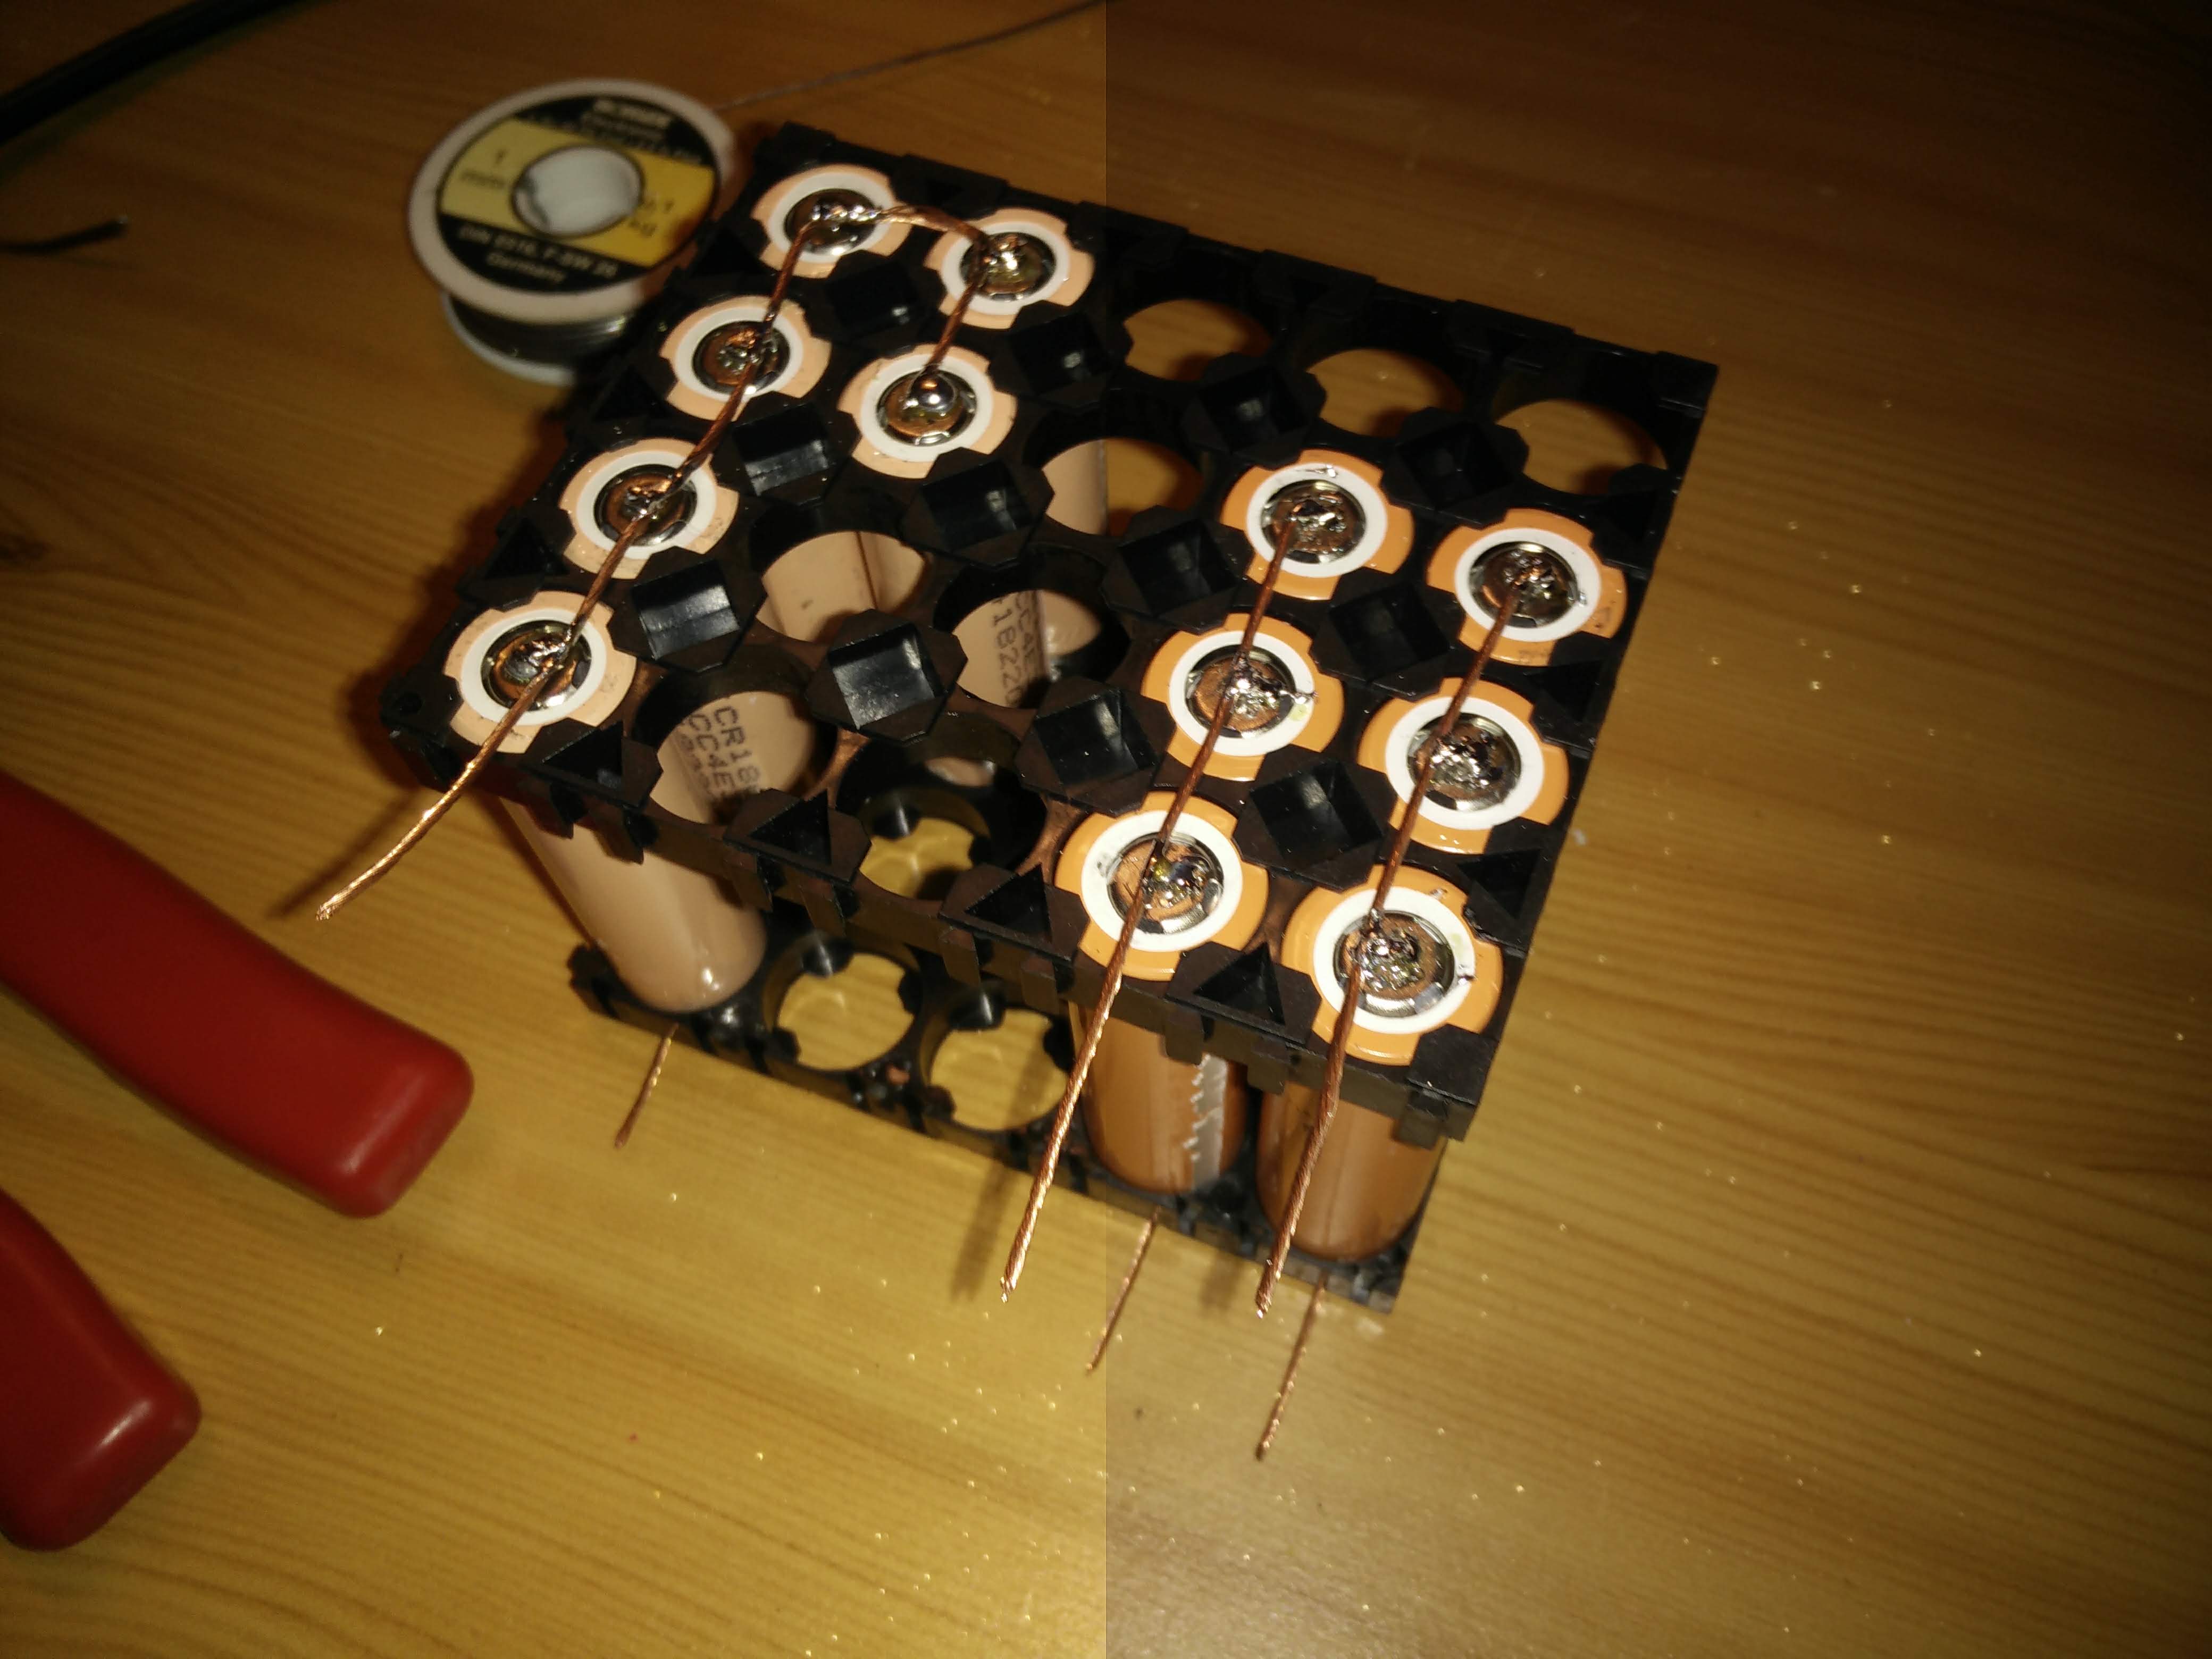
Now it’s time to put them together, and solder them together. The start for me looked like this:
Step 4:
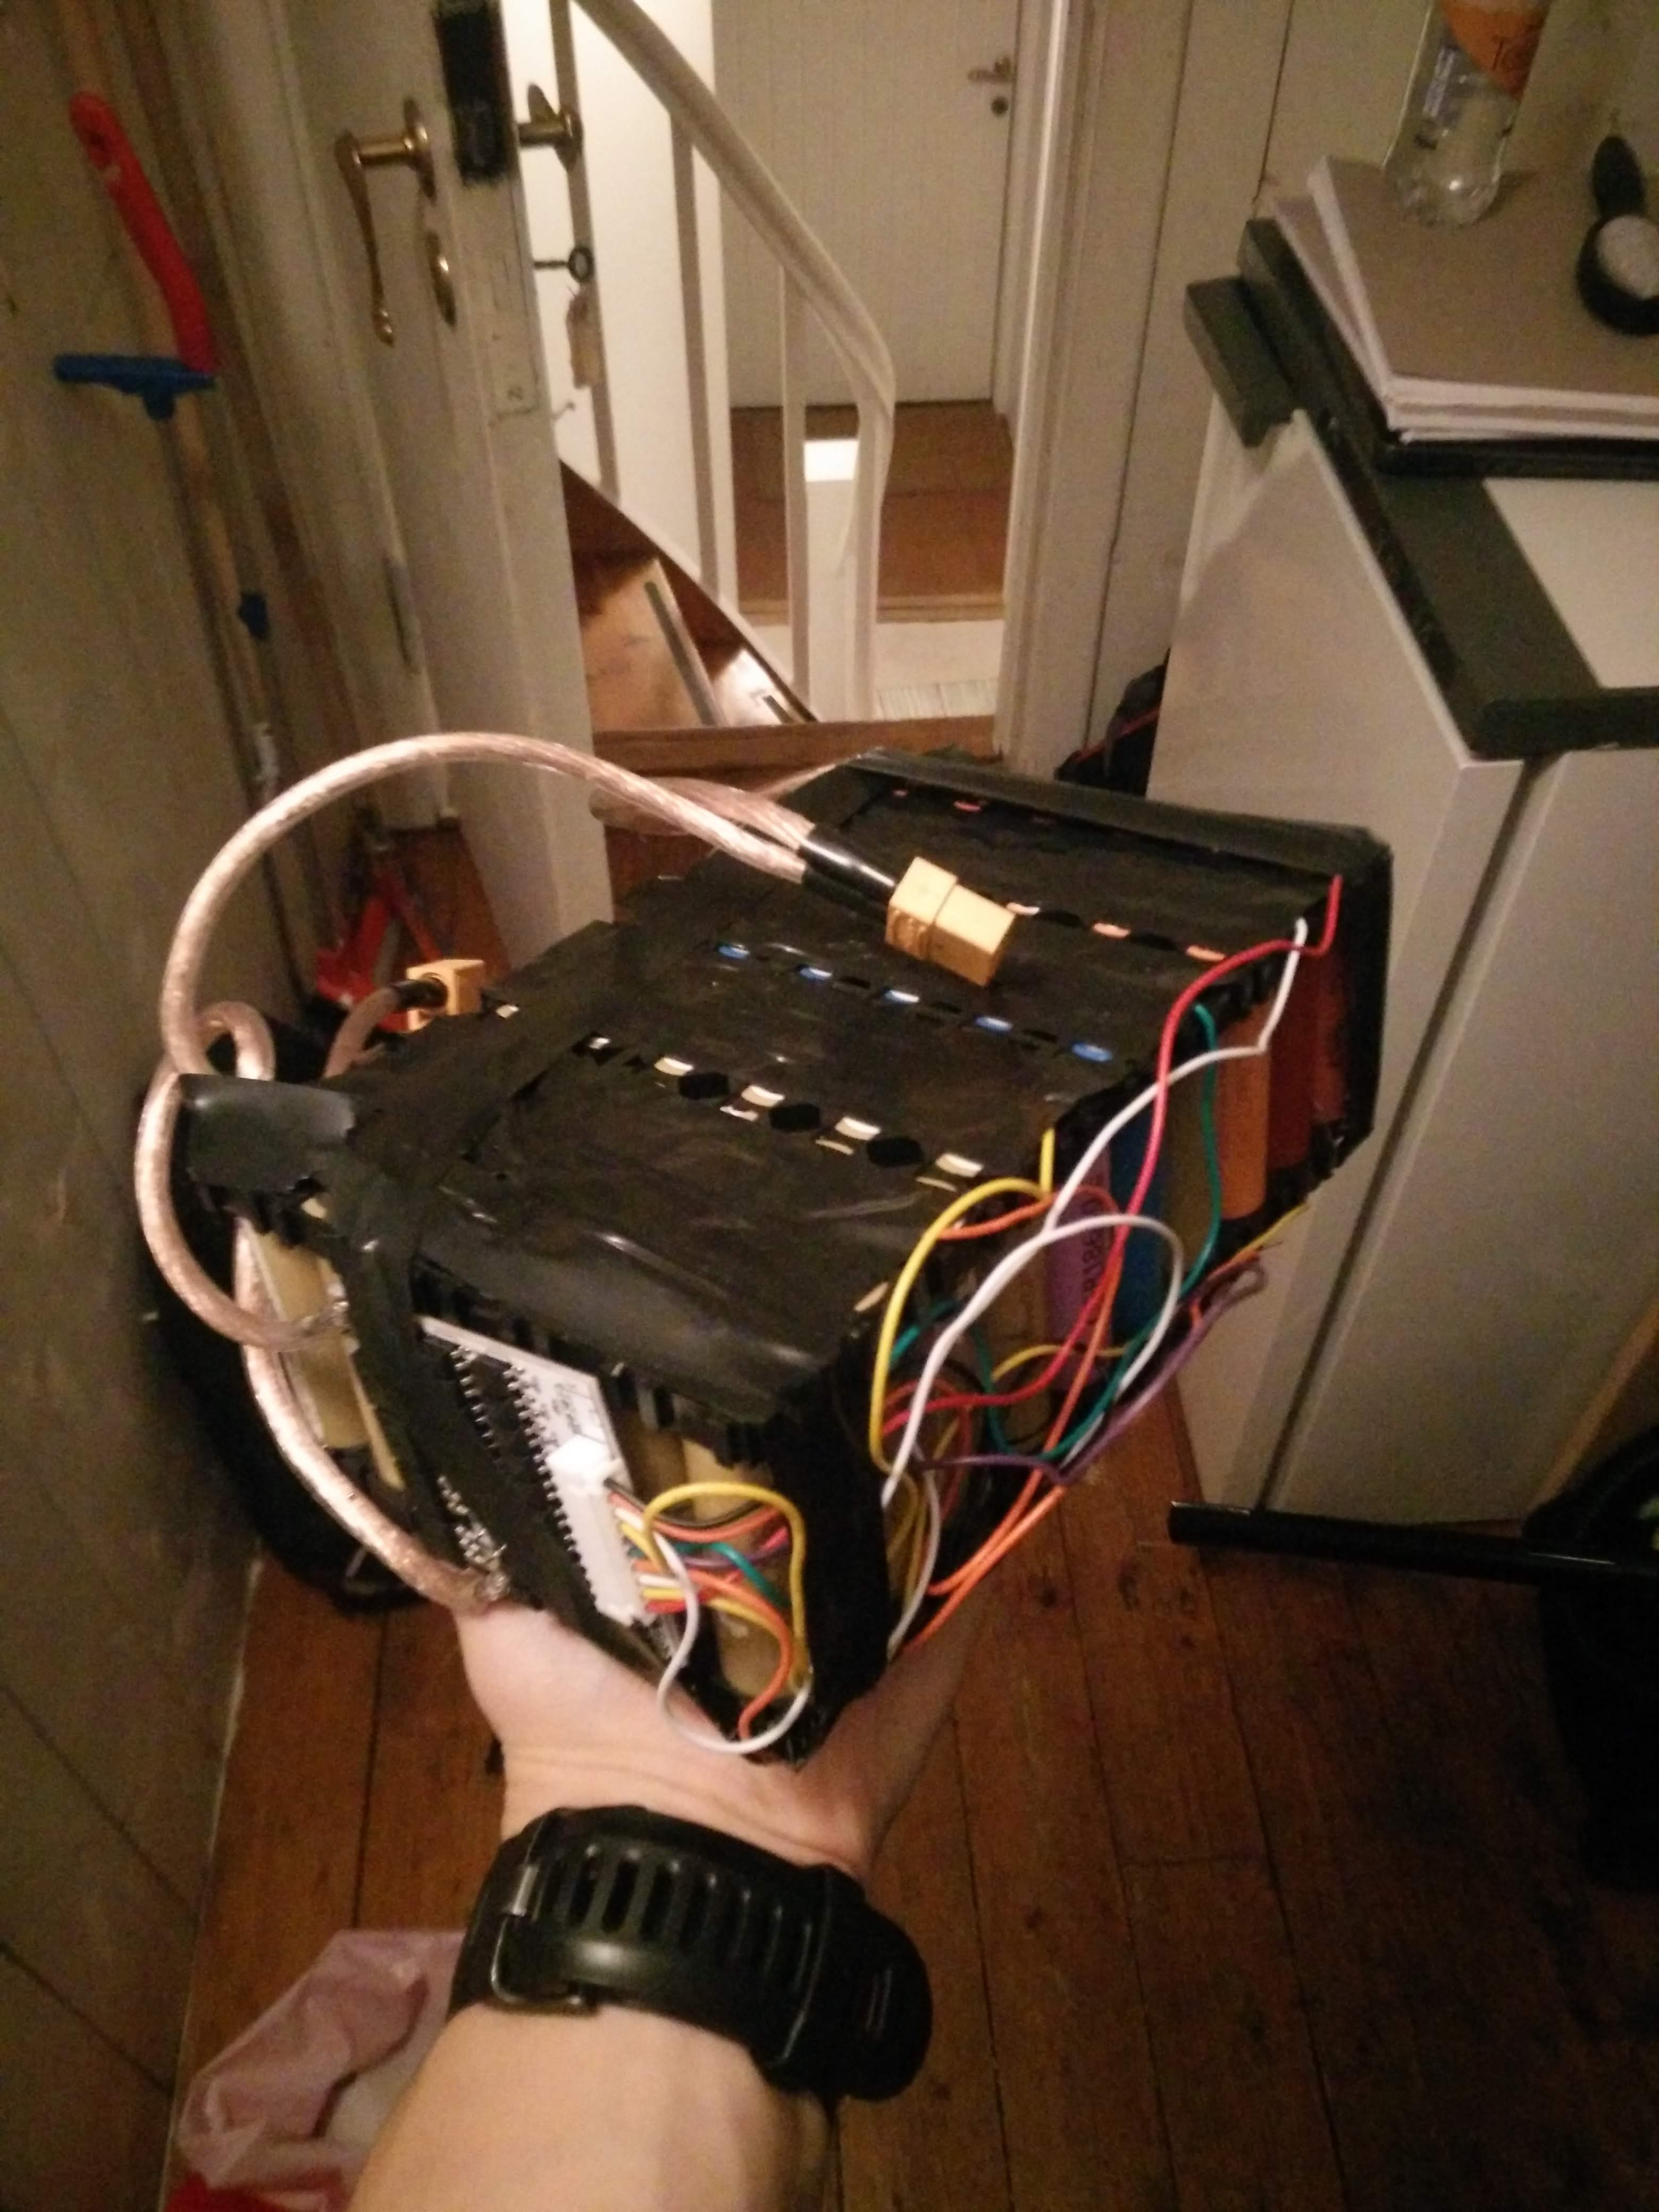
Now you sould solder on the BMS, and all the lead wires. How to do that, you can see here.
The battery can look something like this when finished:
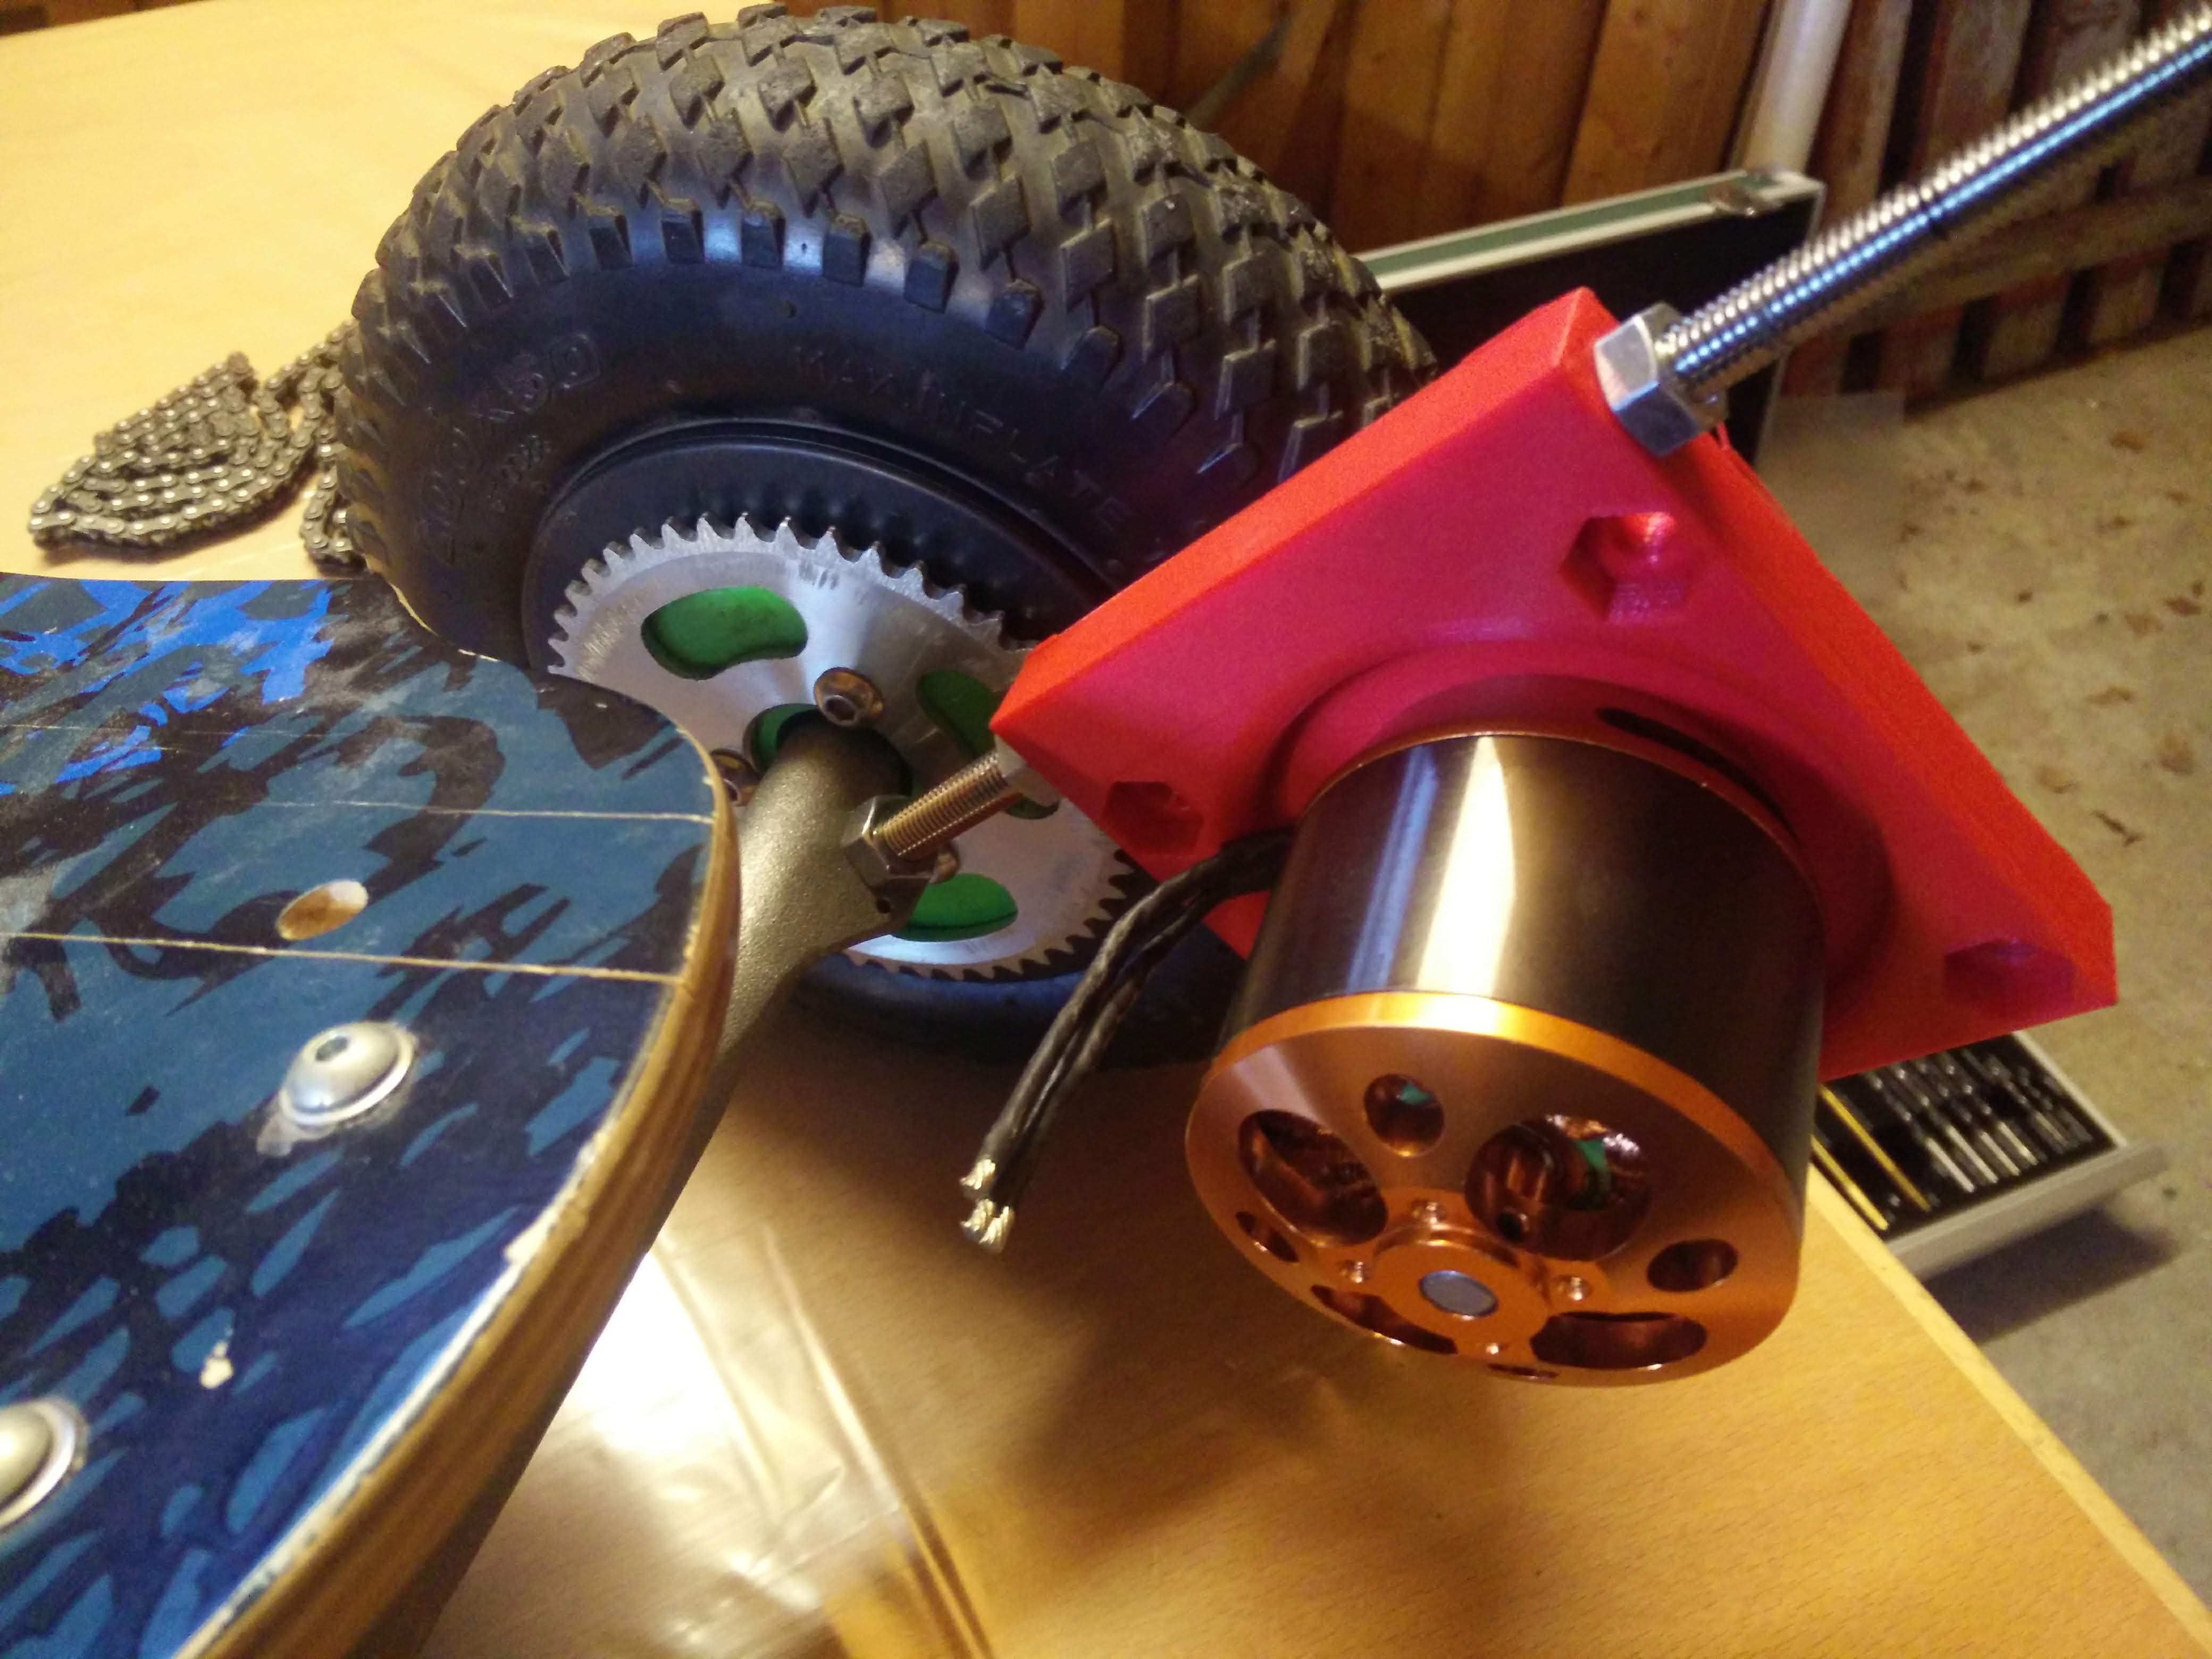
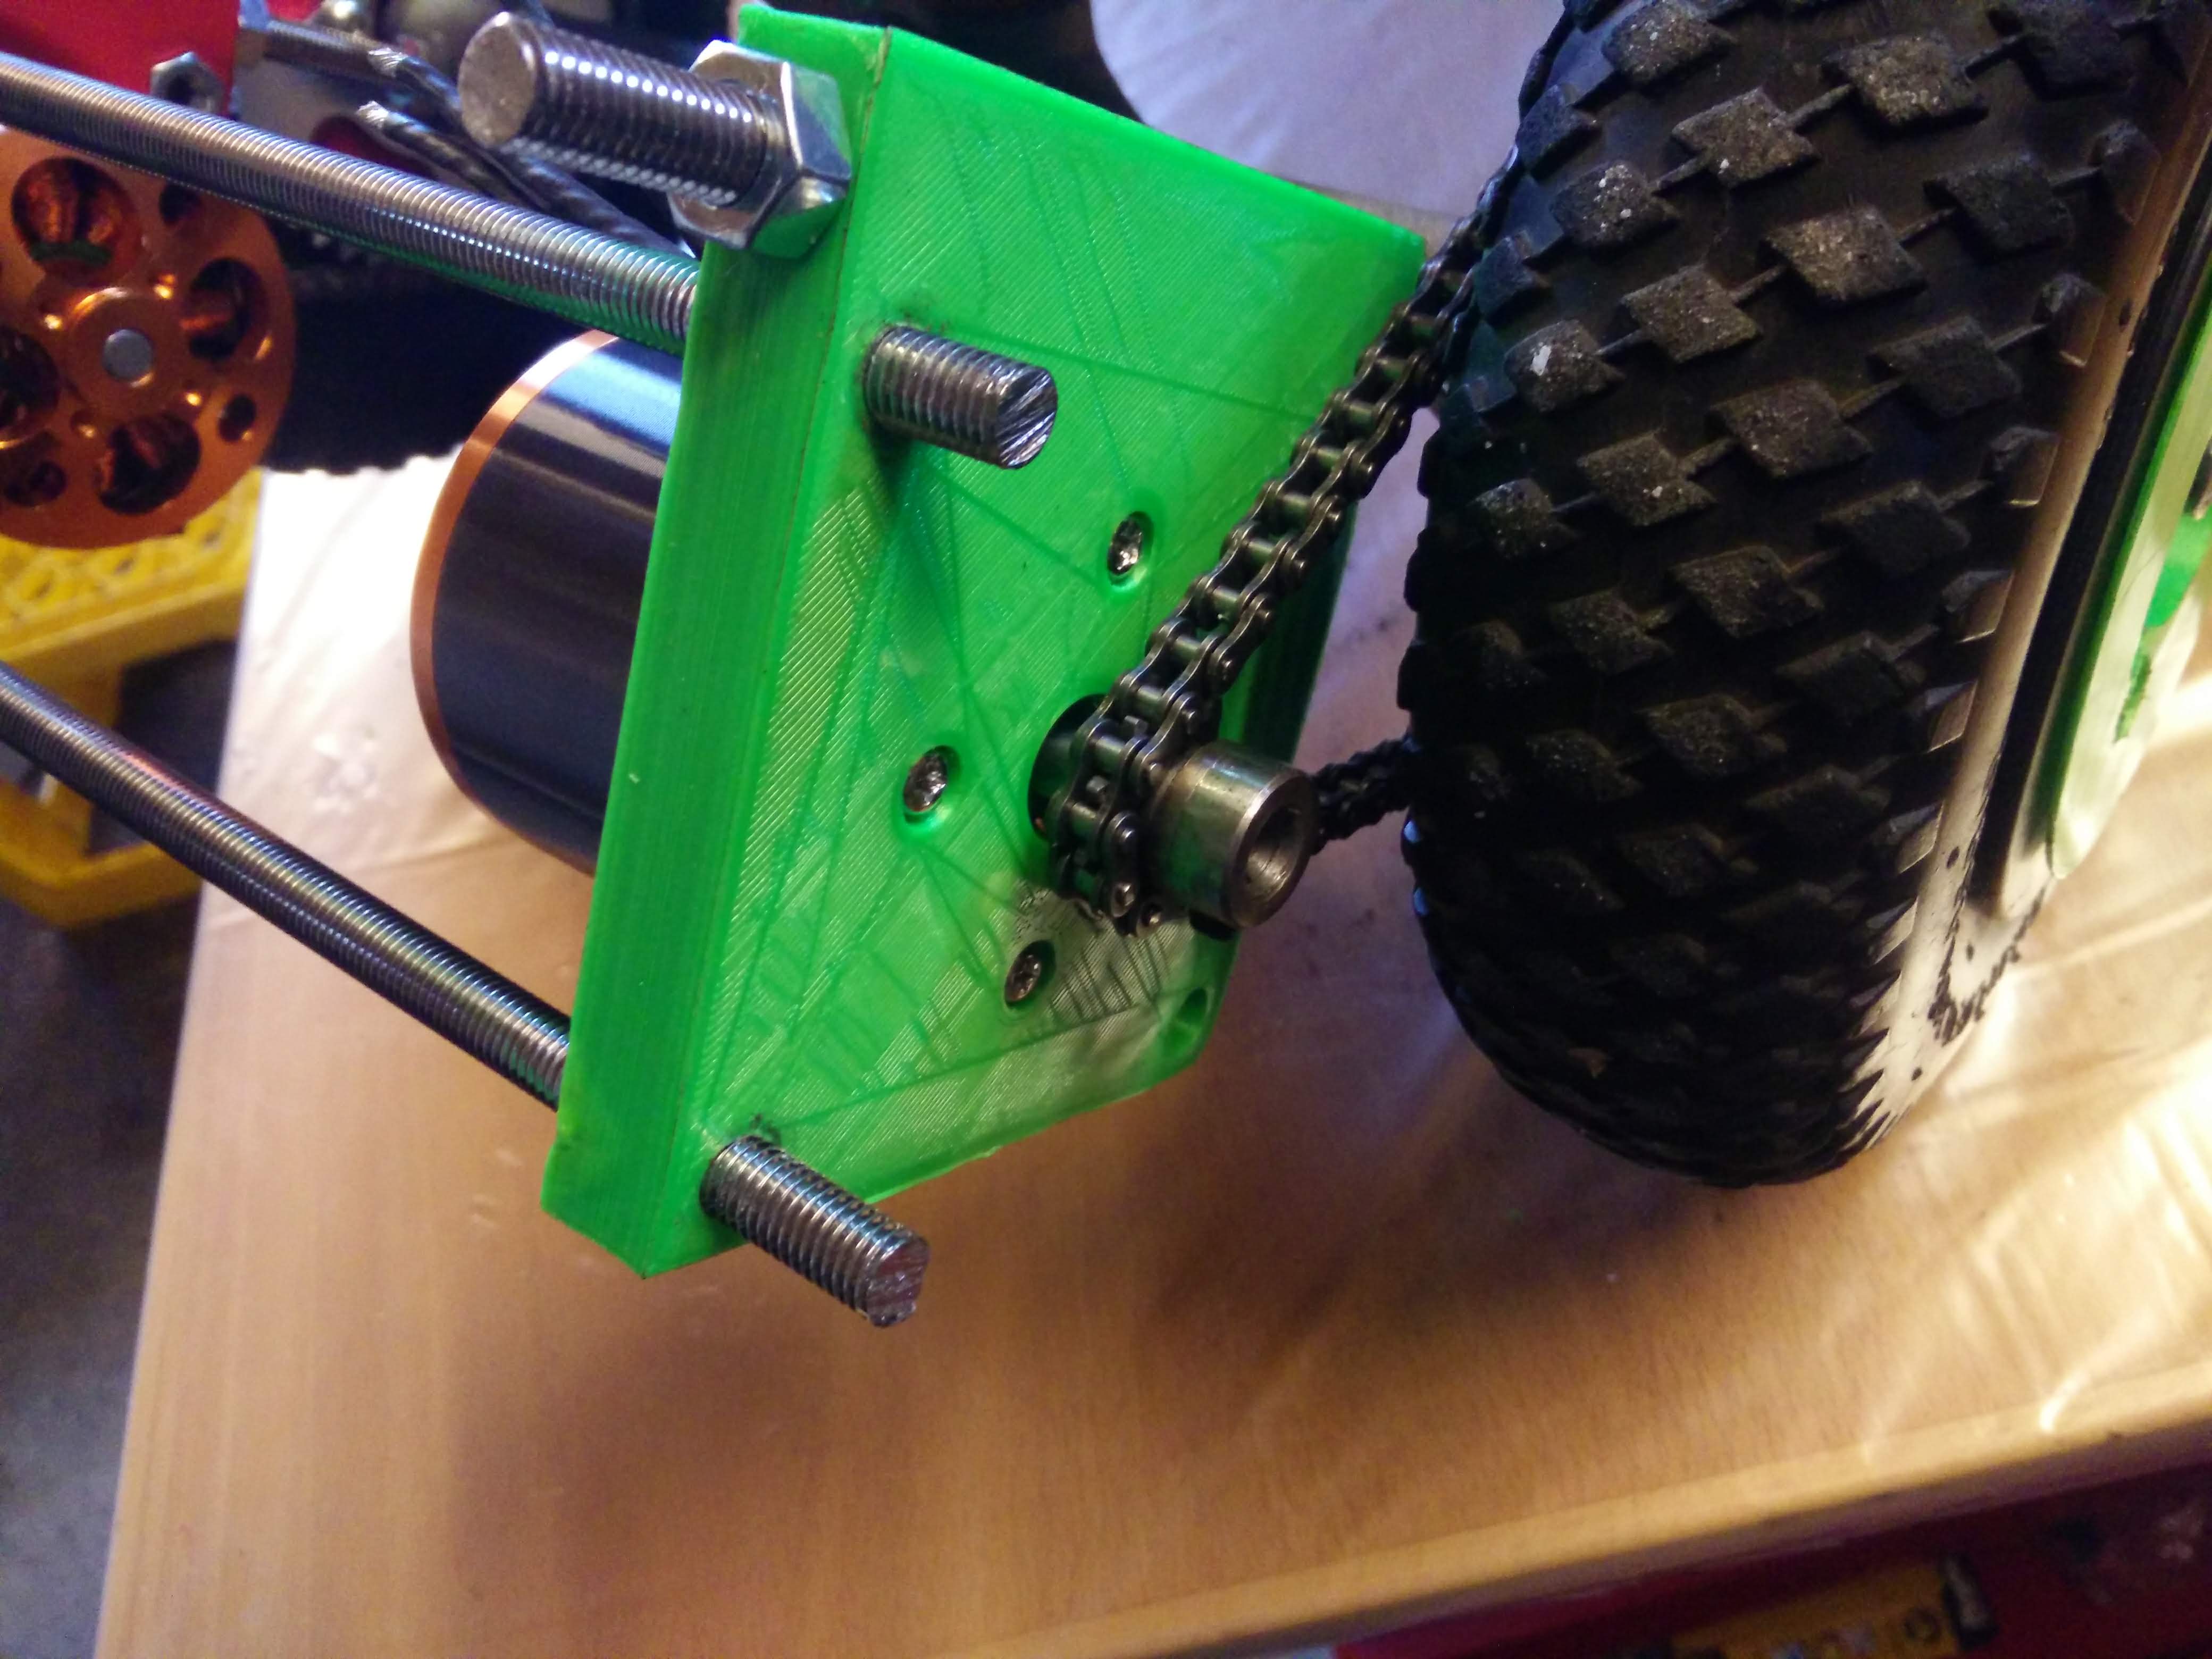
Motor-mounts
The motor mounts was a pain in themselves. After many iterations, and failed 3D prints, this is the prints I advise you to use.
Step 1:
The way we mount the motors to the board, is with the bolt-holes from the brakes of the MBS atom. So go ahead and remove the brakes. These bolt holes are M8 threaded, so this is where we will use our M8 threaded rod.
Step 2:
Print the motor mount bracket, and test-fit it on the board. Put on nuts like shown in this pictue:
(please disregard the brackets & chains and everything on the wheels, we will get to that later)
Step 3:
After test-fitting, go ahead and cut the metal rod to fit. Get it done for both sides. Now press nuts into the nut-holes on the 3D-printed brackets. After that, you can cut fitting rods that fit between the brackets like so:
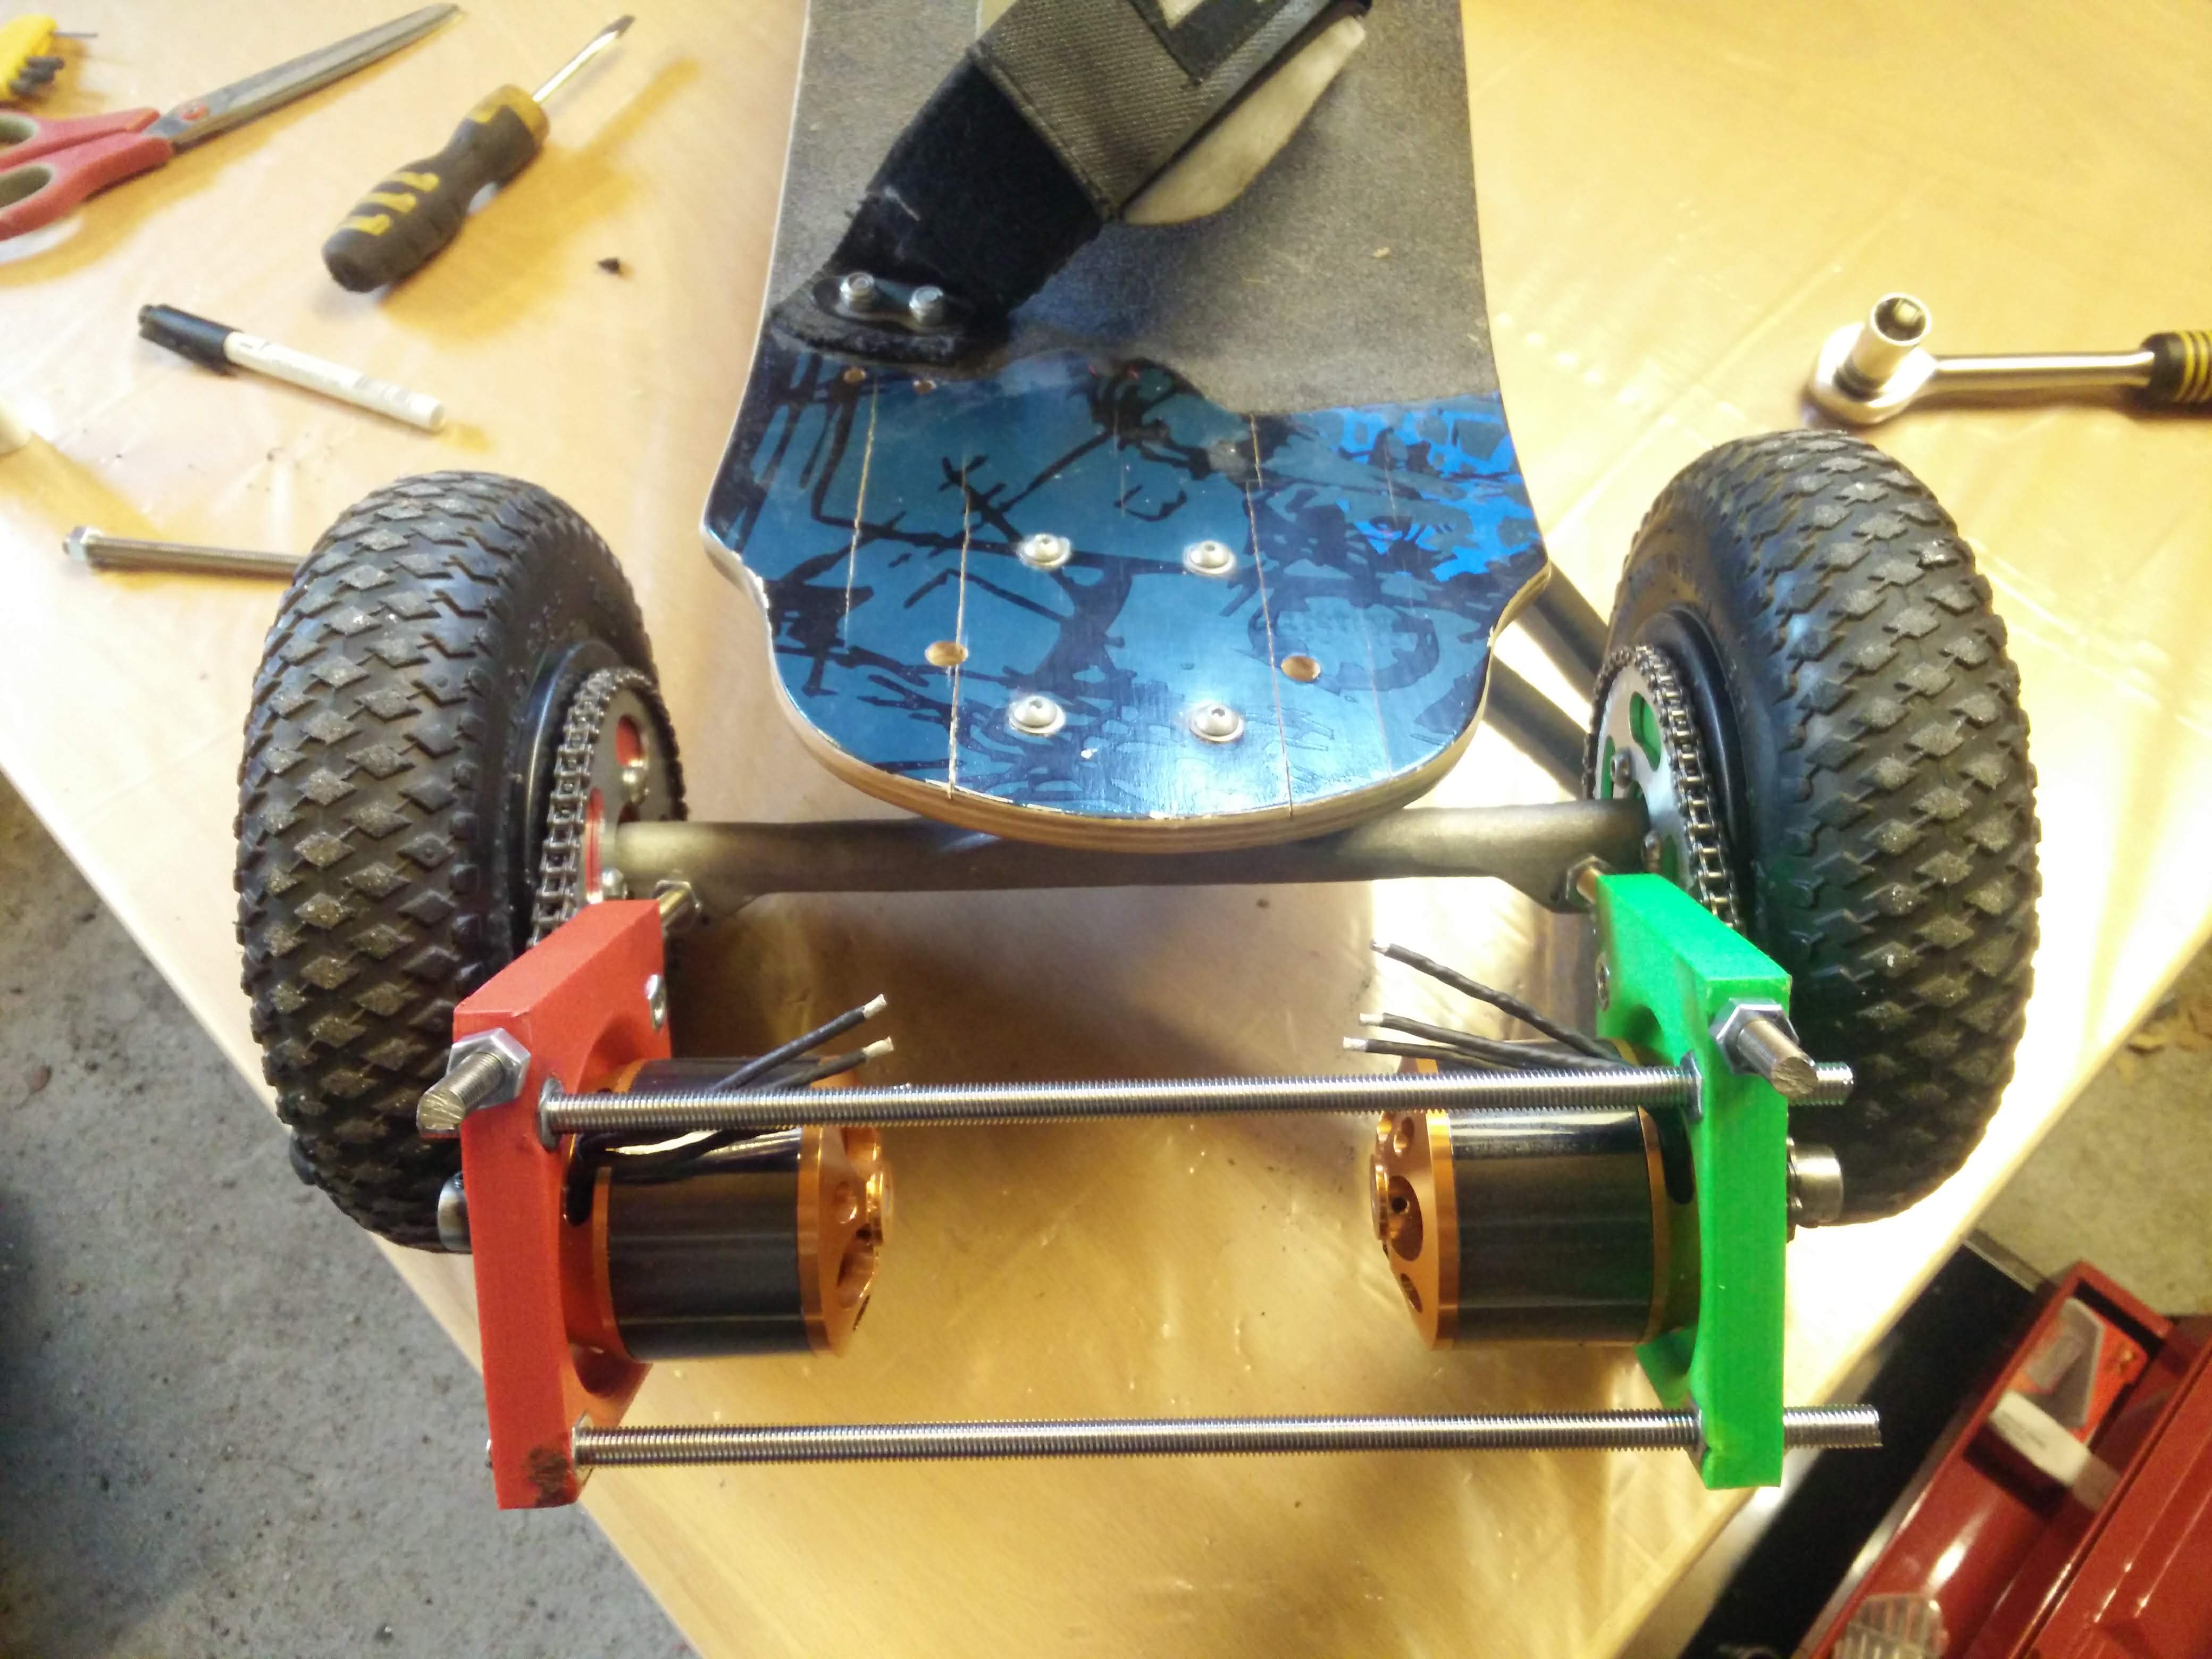
You can go ahead and secure the rods in the truck with threadlock, but dont secure the nuts holding the motorbrackets! You will need to adjust the height of the brackets later.
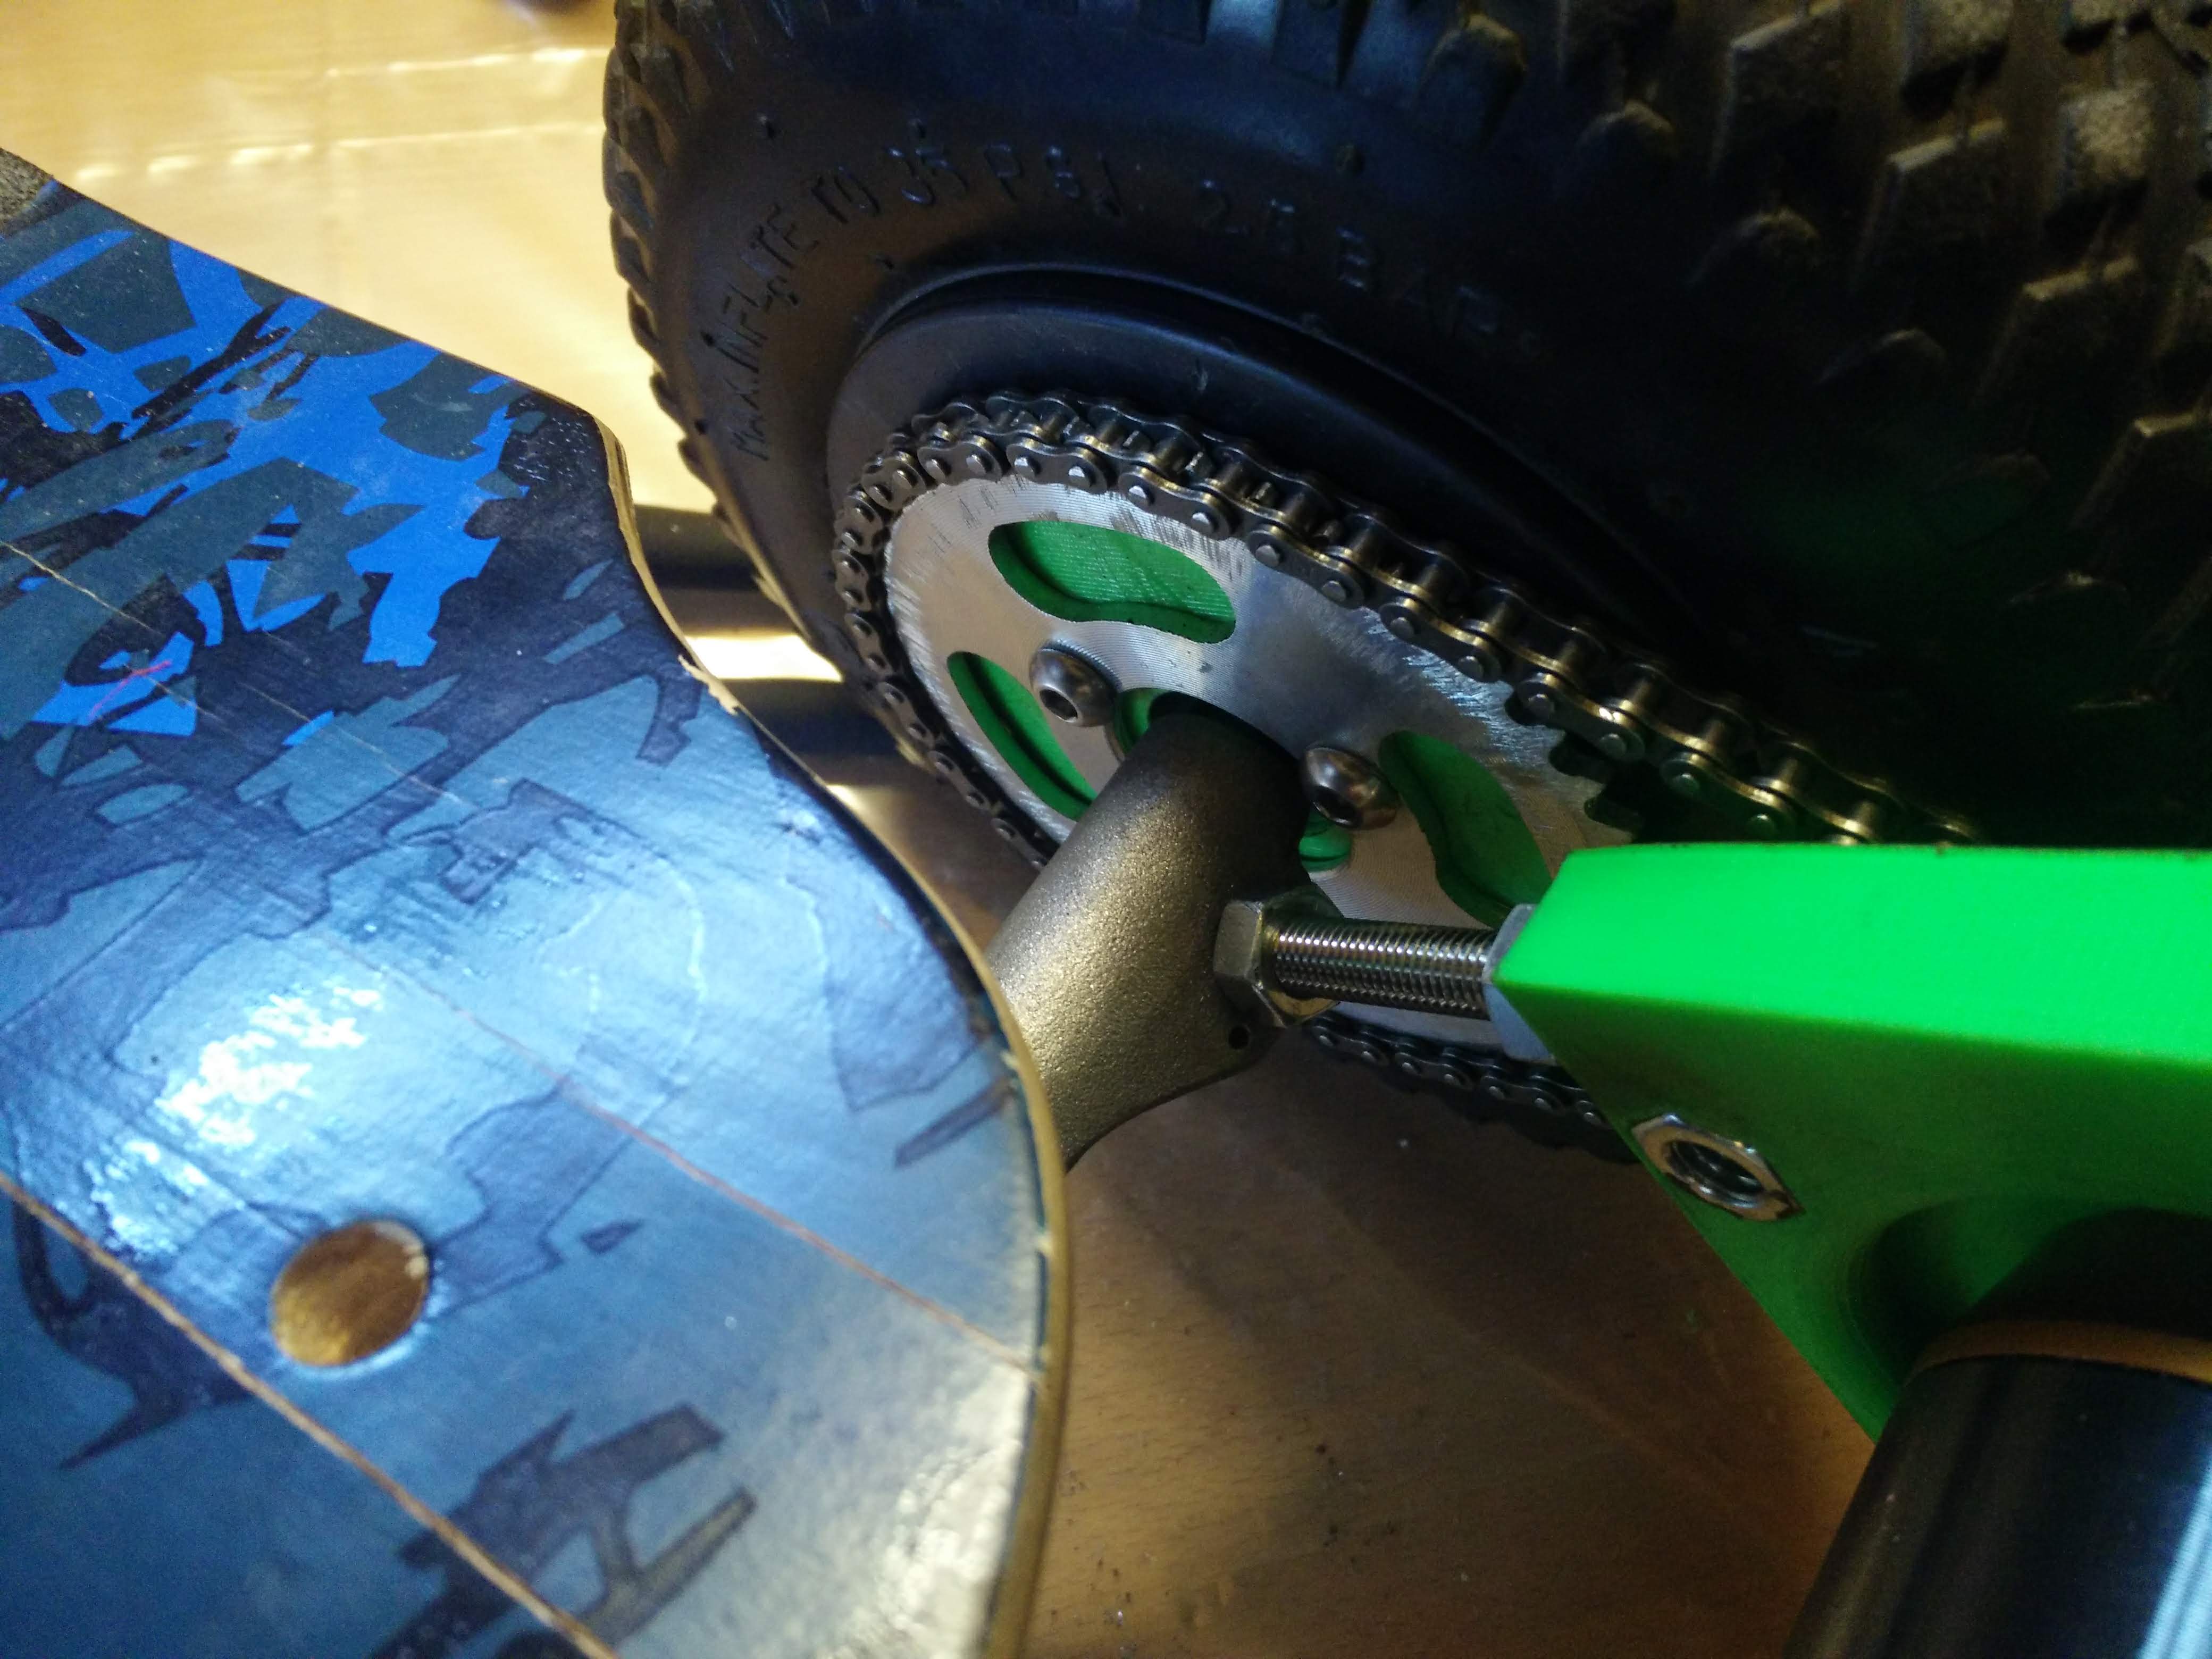
Drivetrain
The drivetrain was maybe the easiest of all. Here, I came up with a 3D print for holding the sprocket to the wheel.
Step 1:
Just remove the brake-discs from the two wheels with brakes. Remember to deflate the tires first.
Step 2:
Put the 1/2-20 nuts for the sprocket in the 3d print, and then place the 3d print in the wheel. Afterwords, tighten the 3D-print to the Wheel with the bolts that held the brakediscs.
Step 3:
Bolt the sprocket to the 3d print with the 1/4”-20 bolts. Now the wheel sprockets are done.
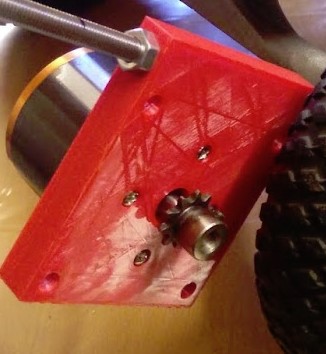
Step 4:
File a flat spot on the motor shaft, and put on the small sprocket on the motor shaft, and tighten the screw. Make sure to put a lot of thread lock on this, unless you want it to fall off when you are riding down a hill and suddenly looses brakes :D
Step 5:
Test-fit the chain, and cut it to lenght. To put on the chain afterwords, you just slide the motor mount down to the truck, put on the chain, and then pull up the motor mount so that the chain is tight enough.
It will probalby look something like this:
Motorcontroller / ESC
The motorcontroller which I bought off of aliexpress for so cheap was a real pain. The problem was that the brakes was way to sudden(and strong). It also accellerated very uncontrollably. I will strongly advice anyone to just buy a real ESC, for example a FlipSky (FSESC) 4.20 or better. It will save you a lot of time. However, I made due with this motorcontroller.
Step 1:
First check if everything works. Hook it up to the battery, motors and remote and test throttle and brake.
Step 2:
How I made my box I currently dont have the time to write as it took such a long time. I decided to make it a little beautiful, and put some cooling and lights on it. You can probably just stick it in a box and get it fastened to your board somehow. How I made mine was with Fusion 360, and a 3D printer at my university. Here are some pictures of the making of my ESC-box:
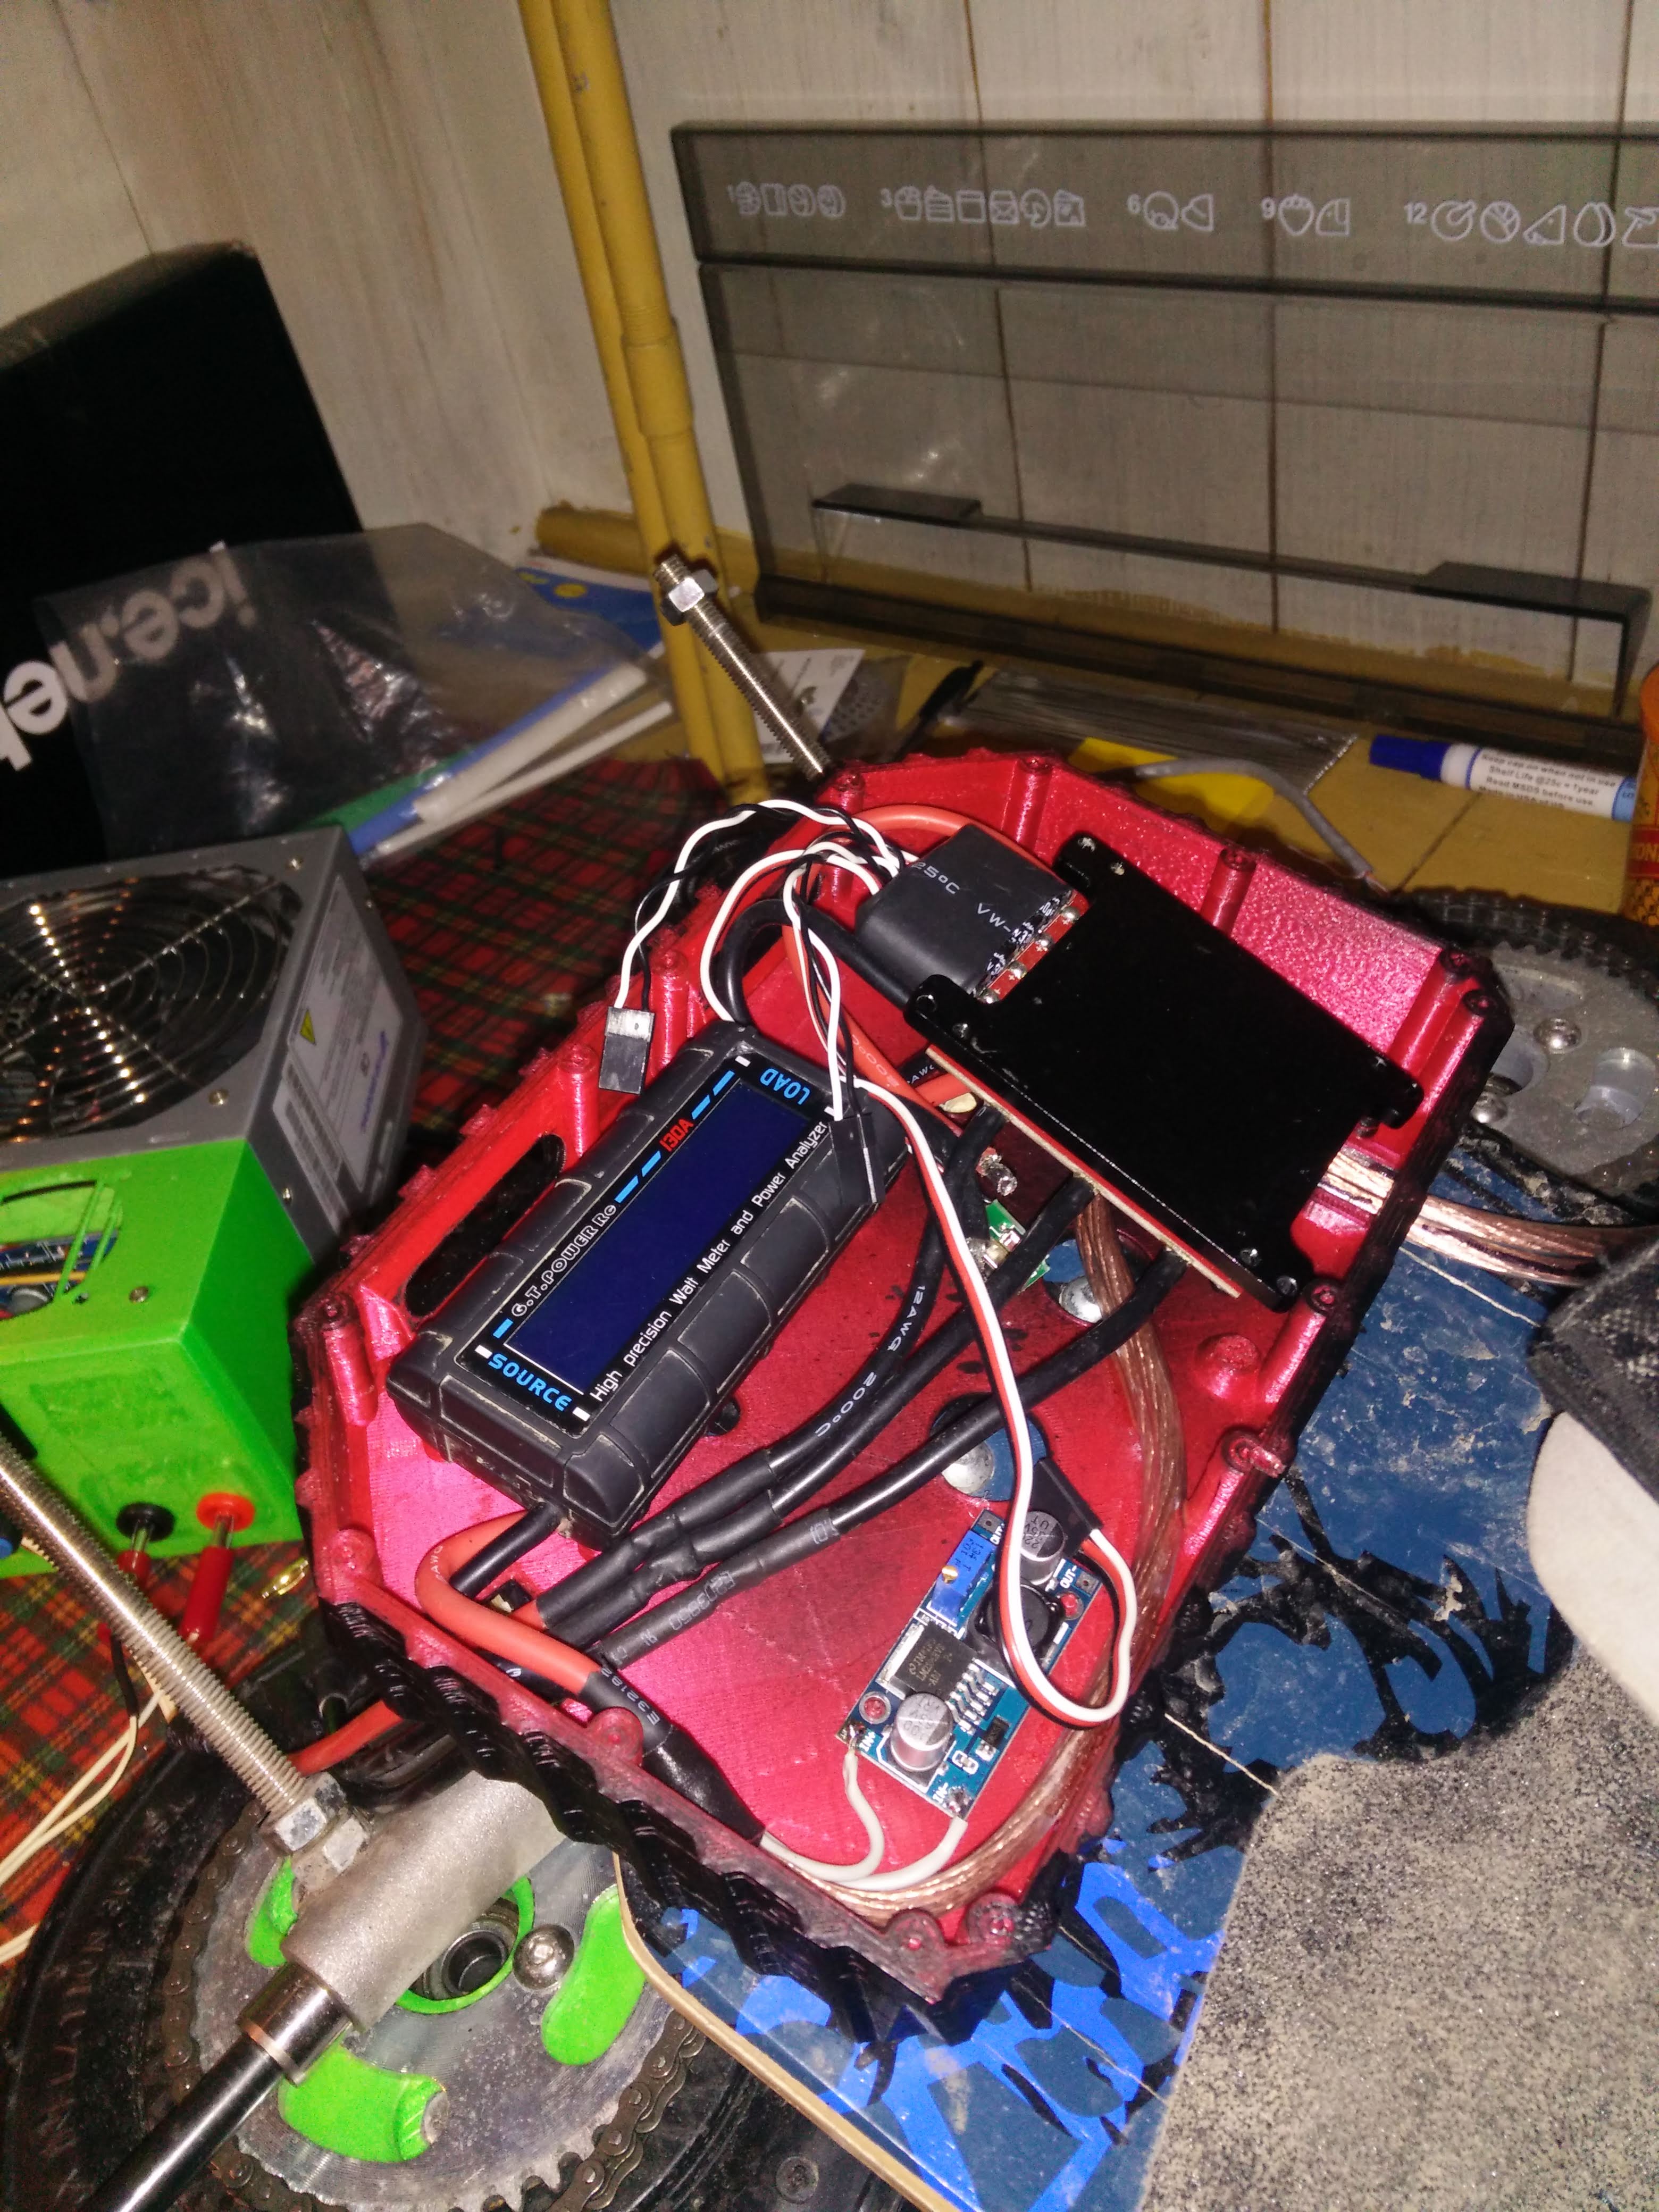

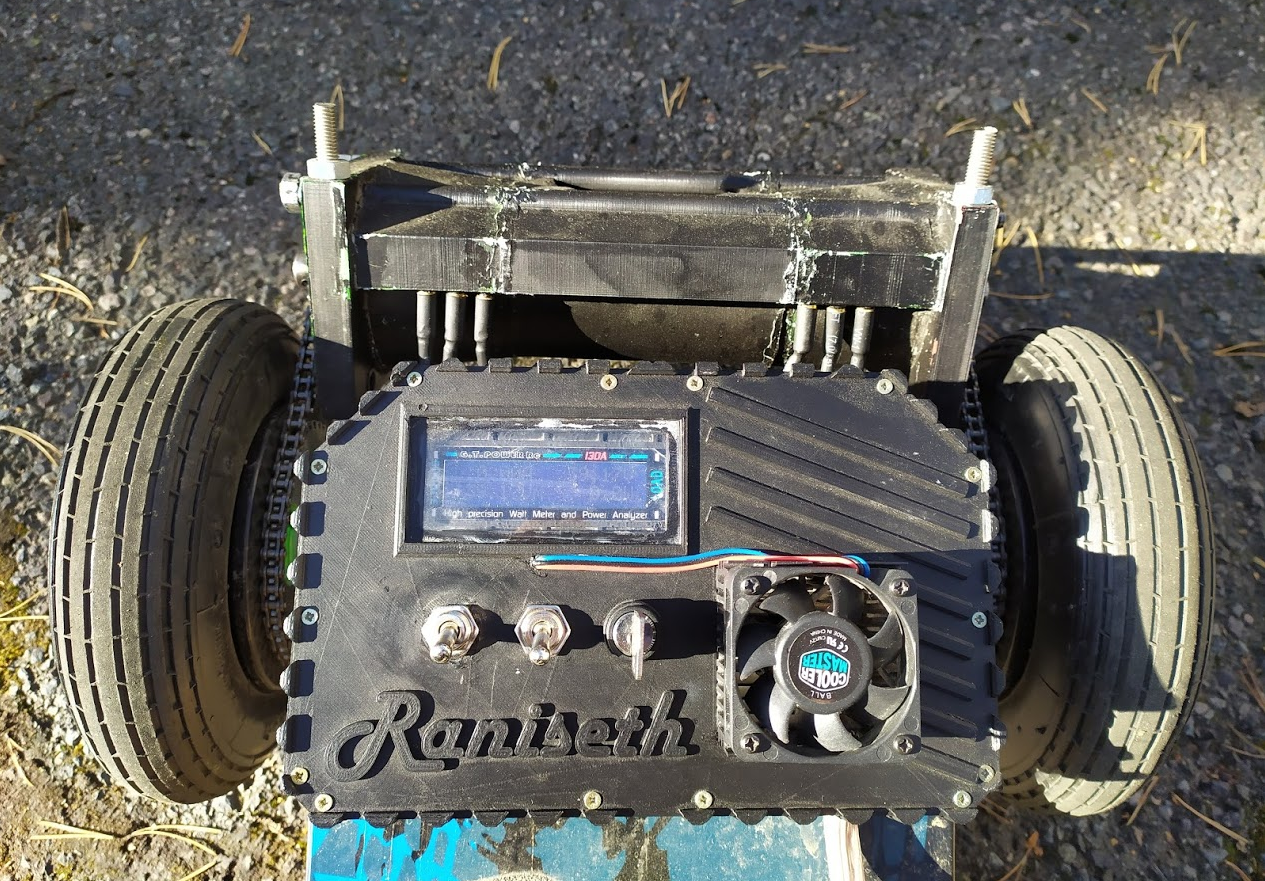
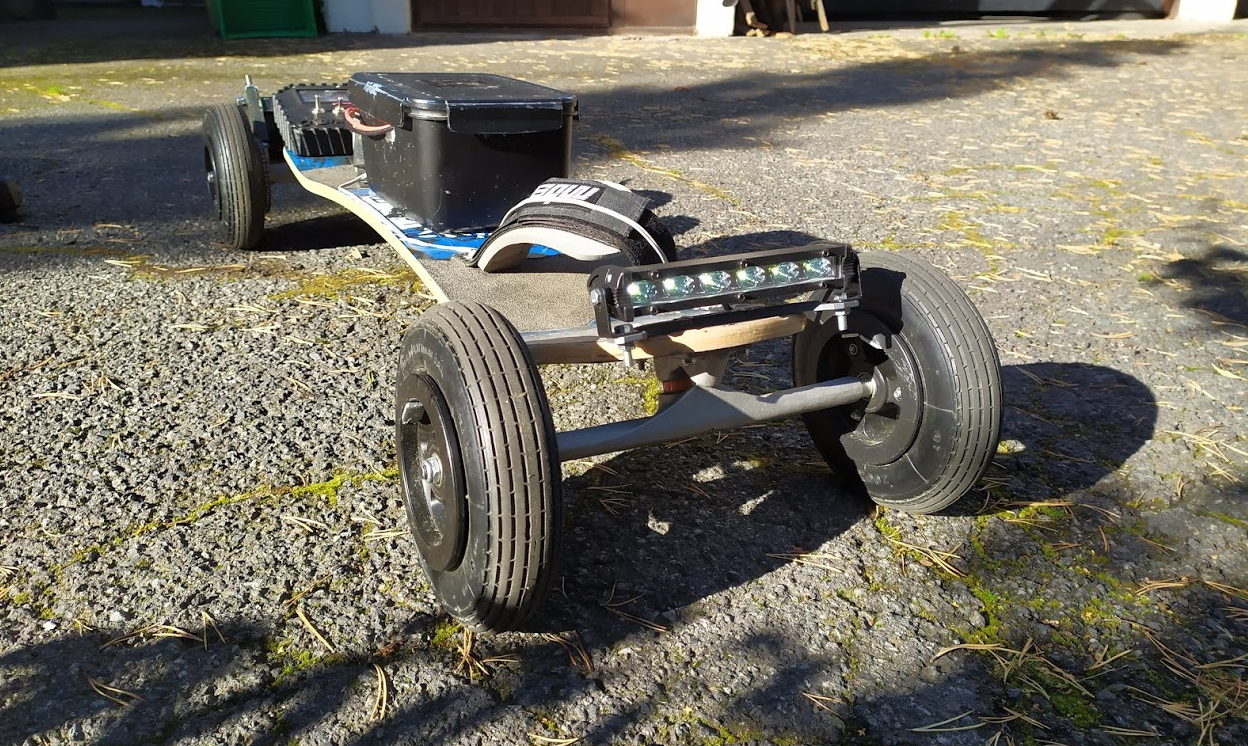
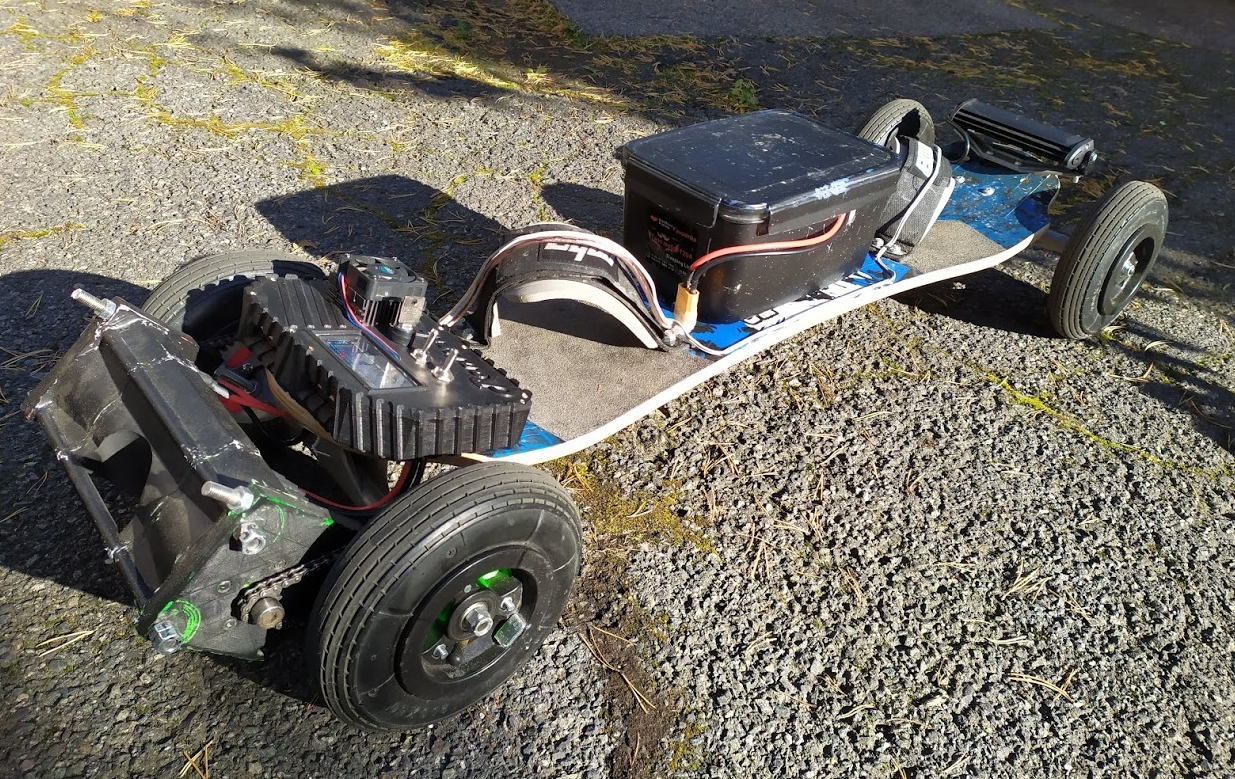
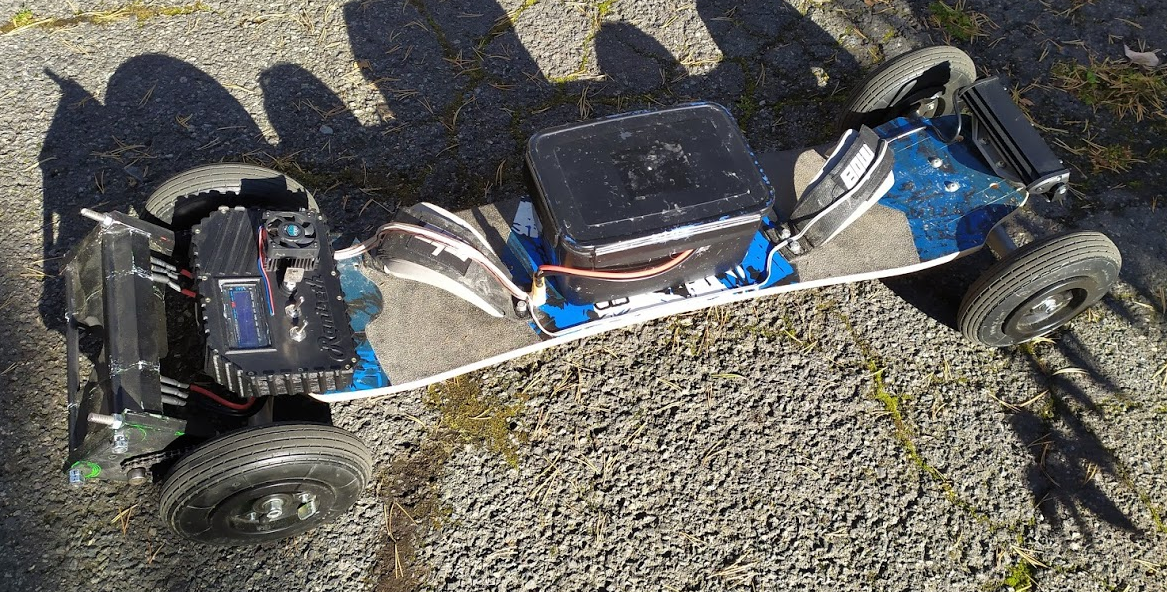
What you see in this latest picture is the motorcontroller (ESC) in the top right, power analyzer (inline with battery cables going to ESC) and a 40-12V step down converter for powering the fan, the two red lights which will be put in the black holes in the back and the headlight. The completed unit looks like this:
Results
It rides at a top speed of around 30km/h (personal best), and goes around 8km on a charge. The wear on these cheap tires are phenomenal and you should count new tires every 40 km (or just buy expensive street tires). Immediately below are a couple of pictures and a video.
 eMTB fronteMTB Box low angleMountainBoard
This video is from mid-prototyping but it’s better than nothing. Maybe I’ll update with a video of the new sleek design later.
Discussion
At this point I decided to end the project. I’ve had a lot of troubles with the ESC trying to make it smoother so it doesn’t kill you. However, no matter what I did to the firmware, or what kind of hacks I pulled on the remote (and the ESC), it was just no hope for it.
The tires would also need changing, as the ones I bough were extremely cheap and unbalancable. That was another thing killing the fun. They wobble like hell at high speeds, enough to throw you off the board when reaching 30km/h. You should get better tires from the start, that way they might also last a little longer than 40km.
Also the batteries are very difficult to charge since they have different capacity and gets out of balance very quickly. I actually had to charge each series sell individually to make them top off correctly at 4.2V. You should expect to buy new batteries pretty soon if you build with old laptop batteries.
Now, this is an extreme budget build, but it just shows how much you can still make if you are on a budget. I wanted an electric skateboard, and I made one. However, I quickly figured it was much more comfortable to just ride a bike, so I will probably not use this e-board alot..
Conclusion
If you are a seasoned skater, and low on cash, this could be a build for you. You get extreme amounts of fun for a very low entry price. Howerver, you must count building hours as fun for this to be correct. Thank you for reading trough the entire article, hope it was helpful or entertaining.
Best regards.